A comprehensive guide on configuring RAID 5 and Logical Volume Management (LVM) on an HP server, specifically tailored for the powerful Proxmox virtualization platform. In this post, I will take you through each step of the process, from utilizing HP Smart Storage Admin to creating a RAID 5 logical drive. We’ll then cover booting the HP server, listing and manipulating disk partitions, and finally, creating an LVM in Proxmox.
Table of Contents
- HP Smart Storage Admin
- Create Logical Drive Raid 5
- Boot HP Server
- List Disk Partition
- Manipulate Disk Partition Table
- Create LVM in ProxMox
- Closing Notes
HP Smart Storage Admin

Create Logical Drive Raid 5

Boot HP Server

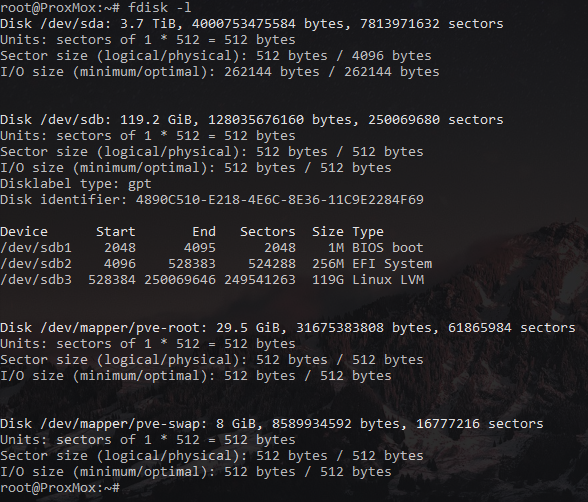
List Disk Partition
1
fdisk -l
Manipulate Disk Partition Table
Take note of the output from fdisk -l when you find the logical device create by the HP Smart Storage Admin // Raid 5 – In this case it was /dev/sda at 3.7 TB
next command is:
1
cdisk /dev/sda
Choose gpt as a label type 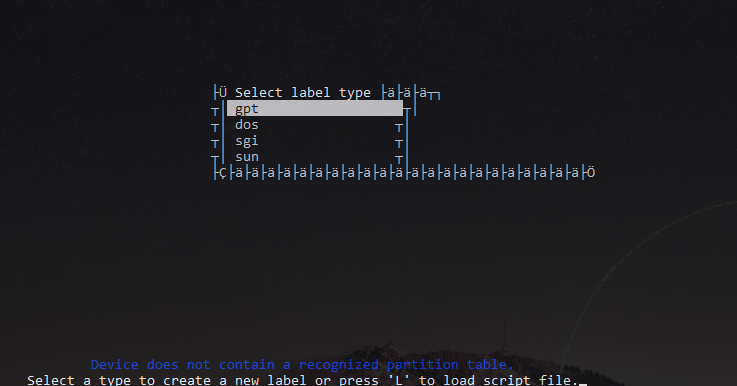
Choose New at the bottom 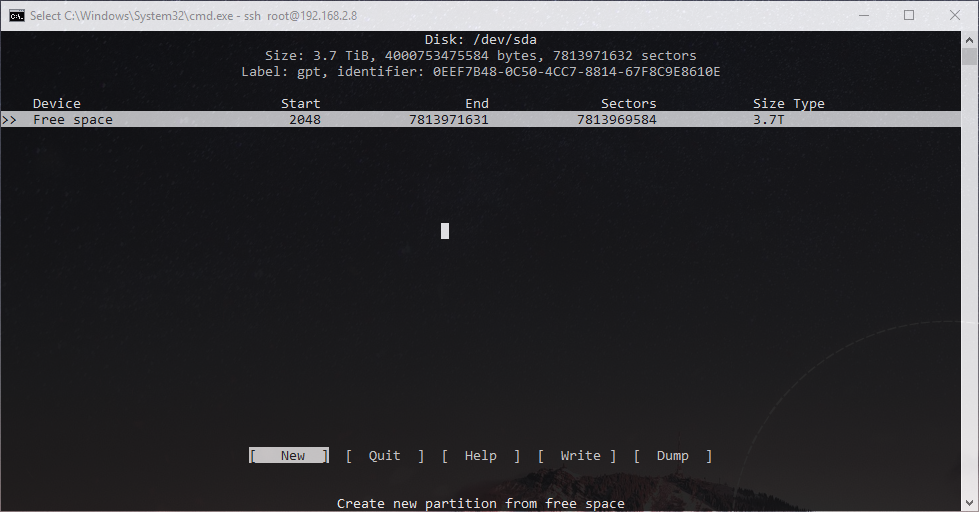
Complete! 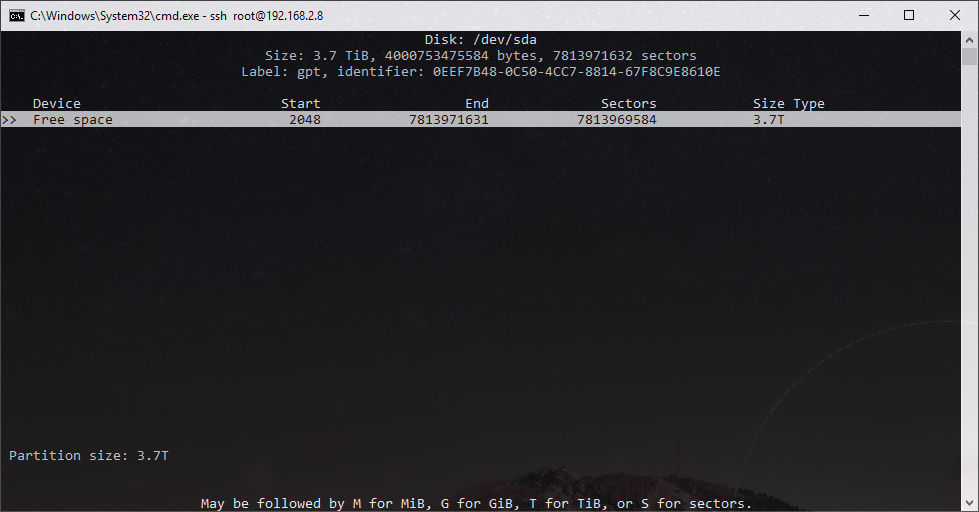
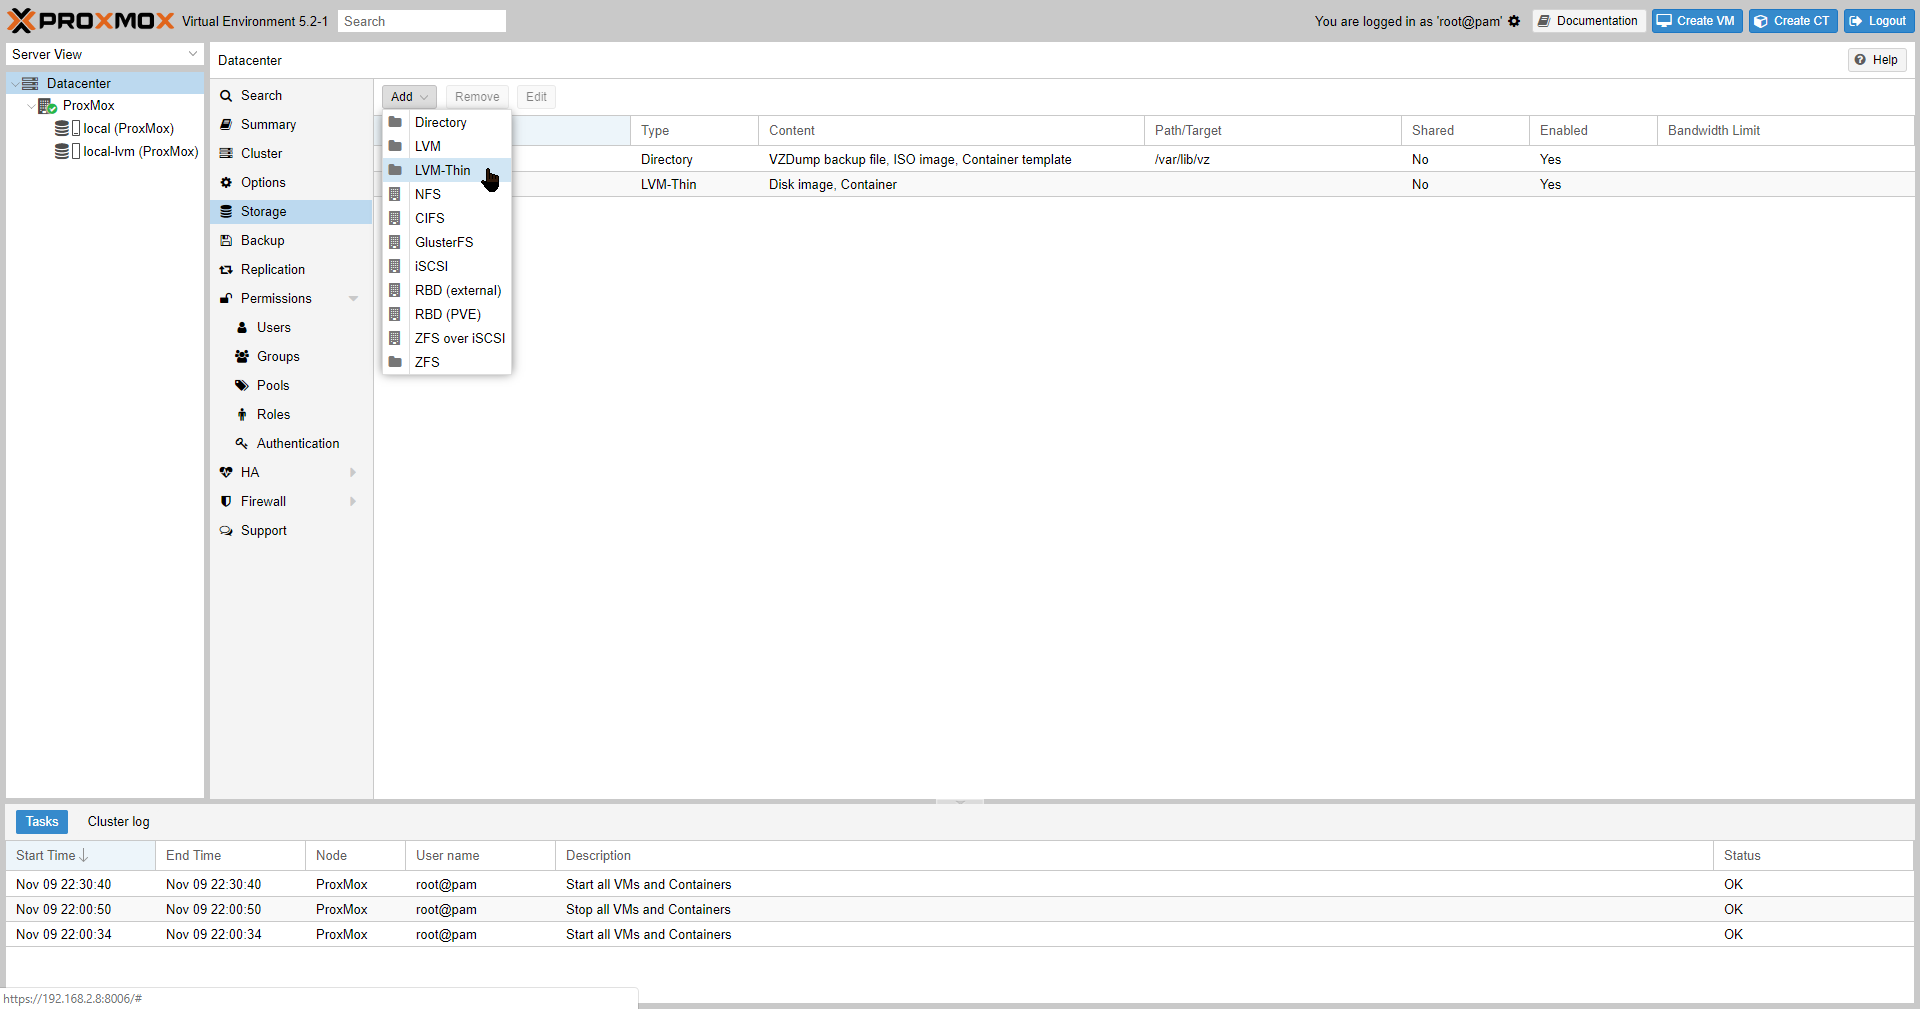
Create LVM in ProxMox
- Create a physical volume in the
/dev/sdapartition with the following command
1
pvcreate /dev/sda1

- Create a volume group in the newly created physical volume
/dev/sda1with the following command
1
vgcreate WD-Red-4TB-Bay1 /dev/sda1

- To create a LVM-Thin disk, we use the command
1
lvcreate -L 100G -T -n vmstore WD-Red-4TB-Bay
breaking down the command we have following:
lvcreate: this command is to create a logical volume in an existing volume group. then we proceed to add the options in directly afterwards-L: the first option-Lis where we define the size of our new logical volume. I have chosen 100Gigs-T: the second option is-Twhere we define to the “lvcreate program” that we are creating not only a new logical volume, but it is a THIN volume. Thus, LVM-Thin! (Logical Volume Management - Thin) Thin is for the Thin-Provisioning which enables features like snapshots-n: last option is-nwhere we define the name of our new logical volume. In this case i have chosen vmstore. This “vmstore” will be what i see in the web-interface under the “thin-pool” drop down of the “WD-Red-4TB-Bay1” volume group i am creating this logical volume in
After defining our logical volume name, we are telling ProxMox which of our already created “Volume Groups” that we are creating this in. In this case we are creating this in the “WD-Red-4TB-Bay1” volume group all these things are happening in this one command line
as a result we are presented with these options in the web interface of ProxMox 
Closing Notes
This is the command used to resize the logical volume in a Volume group. I did not have space for this resize. It is simply a note for a working command line
1
lvresize --size +3.5T --poolmetadatasize +3.5T WD-Red-4TB-Bay1/vmstore

This command is used to remove a Logical Volume from a Volume Group
1
lvremove -f WD-Red-4TB-Bay1/vmstore

In my case I did not want the 100G LVM-Thin. I wanted to use the entire disk. So I removed the logical volume and recreated with the same command with newly desired size
1
lvcreate -L 3.63T -T -n vmstore WD-Red-4TB-Bay1

To view the LVM-Thin storage devices in ProxMox, visit the following page in the WebUI