
Rancher is a popular open-source platform that provides a complete solution for managing Kubernetes clusters. With Rancher, users can easily deploy, manage, and scale their Kubernetes clusters across multiple environments, including on-premise, cloud, and hybrid deployments. Rancher also offers a user-friendly interface for managing Kubernetes, making it an ideal solution for teams with varying levels of expertise. In this post, we will explore the features and benefits of Rancher for Kubernetes, as well as how it can help you streamline your Kubernetes management processes.
Table of Contents
- Find a host machine
- Create 3 or more virtual machines in Proxmox
- Set-up Update Upgrade Install Docker
- Set up Rancher K3s
- Create your Kubernetes Cluster
- Join your master and worker nodes to the cluster
The contents of this post are for demo purposes only. Secrets will be gone before posting and therefore left with intention.
Find a host machine
Personally I am deploying this on my Proxmox cluser through a Debian VM. You can choose anything that works for you though.
Create 3 or more virtual machines in Proxmox
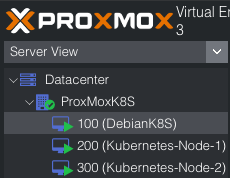
It is necessary to generate a minimum of 3 virtual machines for this task. However, I have decided to use 4 virtual machines to have an additional worker node that can efficiently manage my workloads. Among the virtual machines, the GUI node will be assigned for hosting our Rancher GUI, the master node will function as our etcd, scheduling, and control plane, while the worker nodes will take care of running our workloads.
In a previous post I went over how to deploy VMs by using Terraform. I will be using that method to deploy my VMs to my Proxmox cluster.
Here is what my Terraform code looks like for this method:
main.tf
1
2
3
4
5
6
7
8
9
10
11
12
13
14
15
16
17
18
19
20
21
22
23
24
25
26
27
28
29
30
31
32
33
34
35
36
37
38
39
40
41
42
43
44
45
46
47
48
49
50
51
52
53
54
55
56
57
58
59
60
61
62
63
#Configure ProxMox provider using Telmate found here https://github.com/Telmate/terraform-provider-proxmox
terraform {
  required_providers {
    proxmox = {
      source = "telmate/proxmox"
      version = "2.7.4"
    }
  }
}
#Configure ProxMox API user/permissions and API url
provider "proxmox" {
  pm_api_url = "https://192.168.2.11:8006/api2/json"

  pm_api_token_id = "terraform@pam!terraform_token"

  pm_api_token_secret = "<your-secret-here>"

  pm_tls_insecure = true
}
#Configure Proxmox Resources Here
resource "proxmox_vm_qemu" "Kubernetes-Node" {
  count = 4
  name = "Kubernetes-Node-${count.index + 1}"
  vmid = var.vmid + (count.index * 100)

  target_node = var.proxmox_host

  clone = var.template_name
  #Basic VM settings here
  agent = 1 # QEMU Guest Agent, 1 means installing the guest agent on this VM is set to True
  os_type = "cloud-init"
  cores = 2
  sockets = 1
  cpu = "host"
  memory = 4096
  scsihw = "virtio-scsi-pci"
  bootdisk = "scsi0"

  disk {
    slot = 0
    # set disk size here. leave it small for testing because expanding the disk takes time.
    size = "50G"
    type = "scsi"
    storage = "local-lvm"
    iothread = 1
  }

  # if you want two NICs, just copy this whole network section and duplicate it
  network {
    model = "virtio"
    bridge = "vmbr0"
  }
  lifecycle {
    ignore_changes = [
      network,
    ]
  }

  # sshkeys set using variables. the variable contains the text of the key.
  sshkeys = <<EOF
  ${var.ssh_key}
  EOF
}
Things worth noting with the Terraform code above would be the following:
count- I have this set to 4 but you can simply change this number depending on how many nodes you intend to deploy for your Kubernetes cluster.vmid- I have this starting at 100 from thevars.tffile with the default and then I multiply by 100 for every VM deployed after that. This means that my VMs will deployed with the IDs such as Node-1(100), Node-2(200), Node-3(300), etc.. This is just what I’ve grown accustomed to using, but choose whatever you like here.disk/size- When using Rancher, later we will deploy our cluster by using RKE which puts all the Kubernetes components in their own docker containers when deploying to the nodes. These images that get pulled down are not super small and they add up quickly. The last thing you want is to run out of storage on the nodes and wonder why it’s not working while all these processes are taking place in the background. Give your VMs a healthy amount of headroom for what is to come.
vars.tf
1
2
3
4
5
6
7
8
9
10
11
12
13
14
15
16
variable "ssh_key" {
  default = "<your-ssh-key>"
}

variable "proxmox_host" {
    default = "ProxMoxK8S"
}

variable "template_name" {
    default = "KubernetesNodeTemplate"
}

variable "vmid" {
      type = number
      default = 100
    }
Set-up Update Upgrade Install Docker
Log onto the server via SSH, update and upgrade, and finally install docker. For rancher, a specific version of docker seems to be needed. Use the following script to install docker:
1
curl https://releases.rancher.com/install-docker/20.10.sh | sh
Set up Rancher K3s
Time to set up your Rancher K3s cluster. This “cluster” (it really isn’t) is the management cluster for your kubernetes cluster. The setup process is easy.
Run the following command on your GUI node:
1
sudo docker run --privileged -d --restart=unless-stopped -p 80:80 -p 443:443 rancher/rancher
This command will start rancher in a docker container on your GUI node.
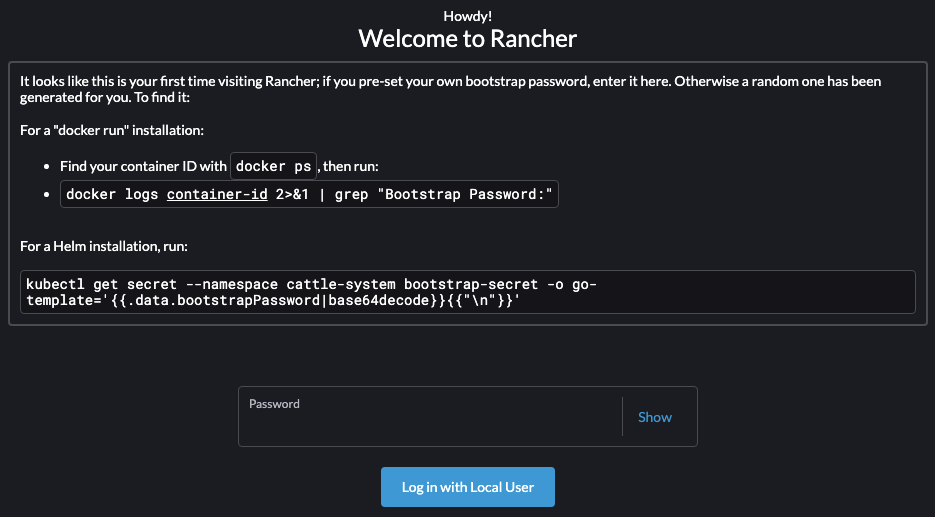
After the docker container is up, you can hit the internal IP of the GUI node at https://<INTERNAL_IP>:443
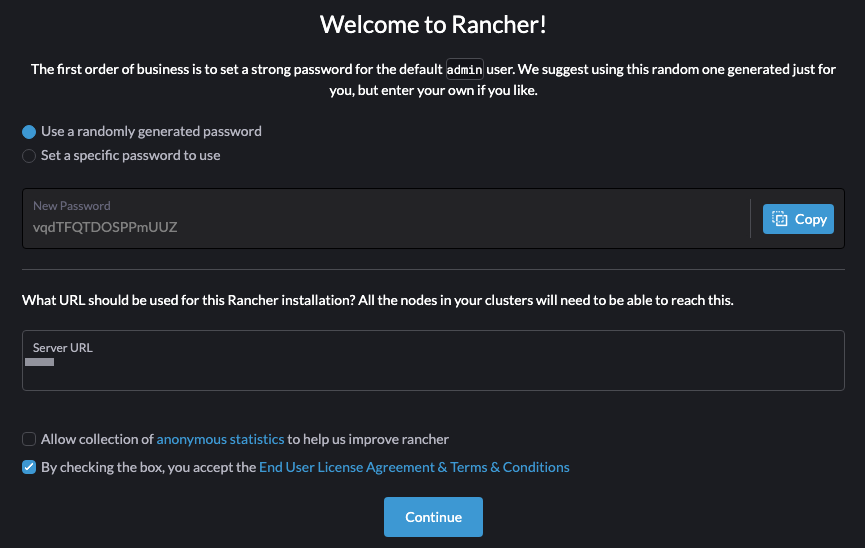
You will be welcomed by a screen asking you to create a password. run the command show and create an admin password.

After you have signed in, you will be greeted by the Rancher Dashboard.
Create your Kubernetes Cluster
Now it’s time to create your cluster.
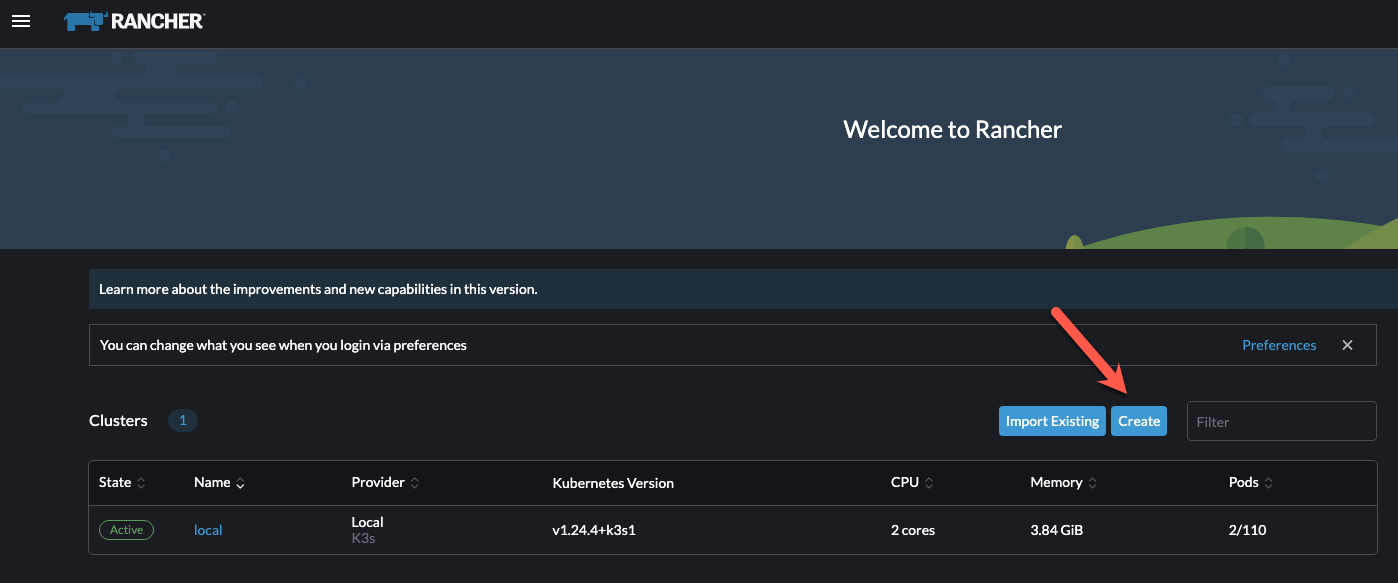
Click the “Create button.
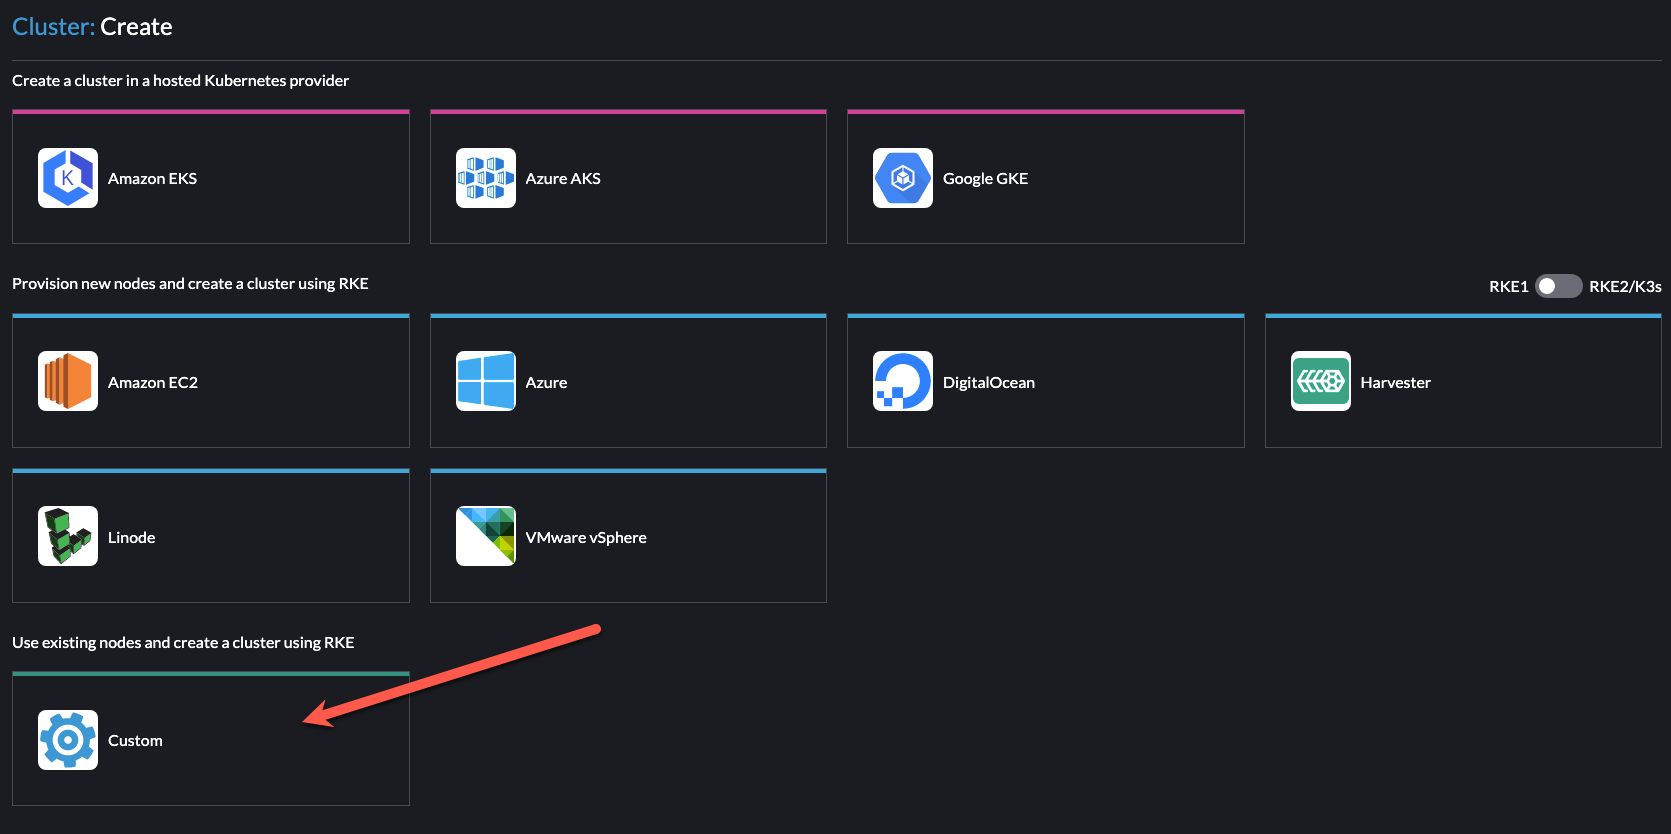
Click the “Custom” option.
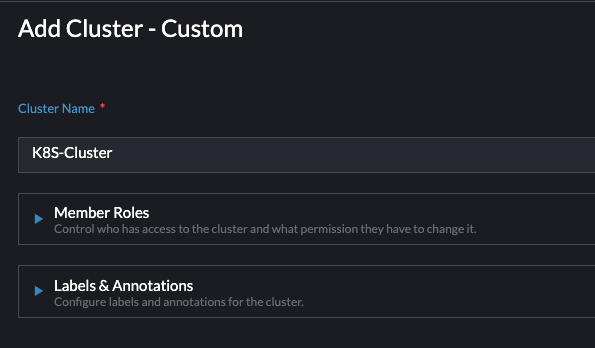
Name your cluster
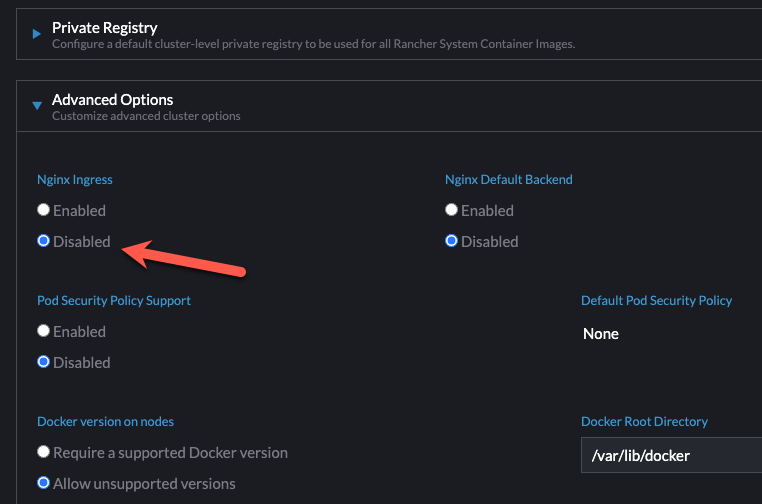
Keep everything default except for the Nginx Ingress option under advanced options. Set this to Disabled. We are going to install traefik later.
Click “Next”.
Join your master and worker nodes to the cluster
Now it’s time to add your master and worker nodes to your new cluster.
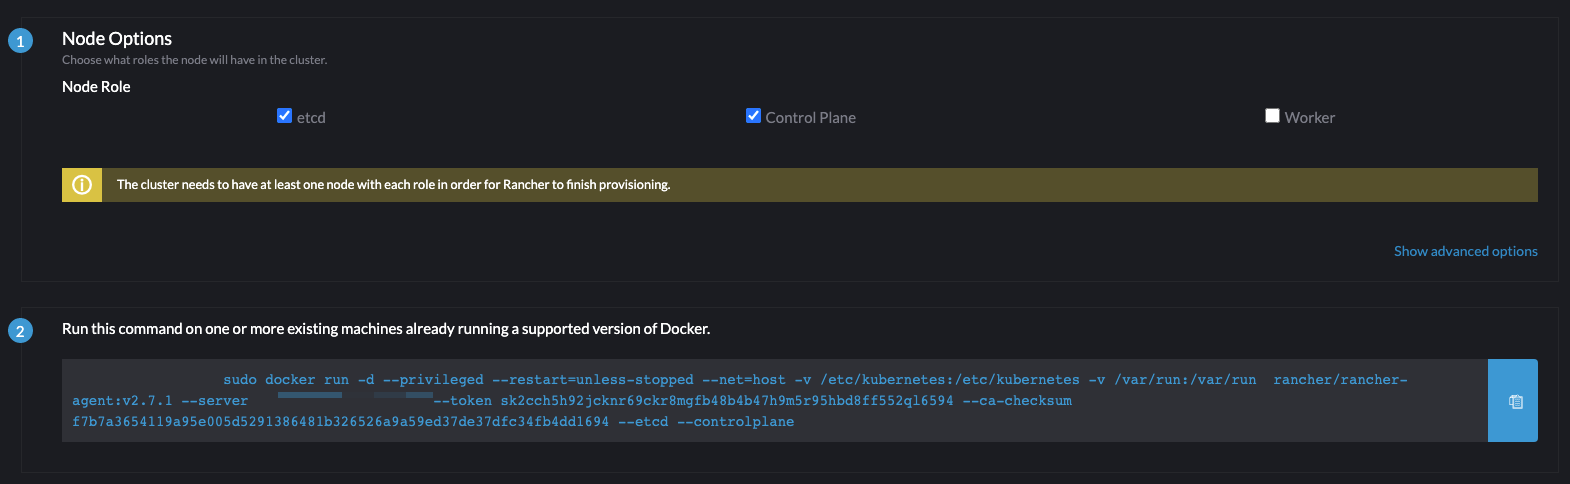
To register your master node, make sure these boxes are checked (etcd, Control Plane). Click on the command to copy to your clipboard and paste it into the terminal with your SSH session to the master node. (You can use your master node as a worker node as well. I would not recommend this.
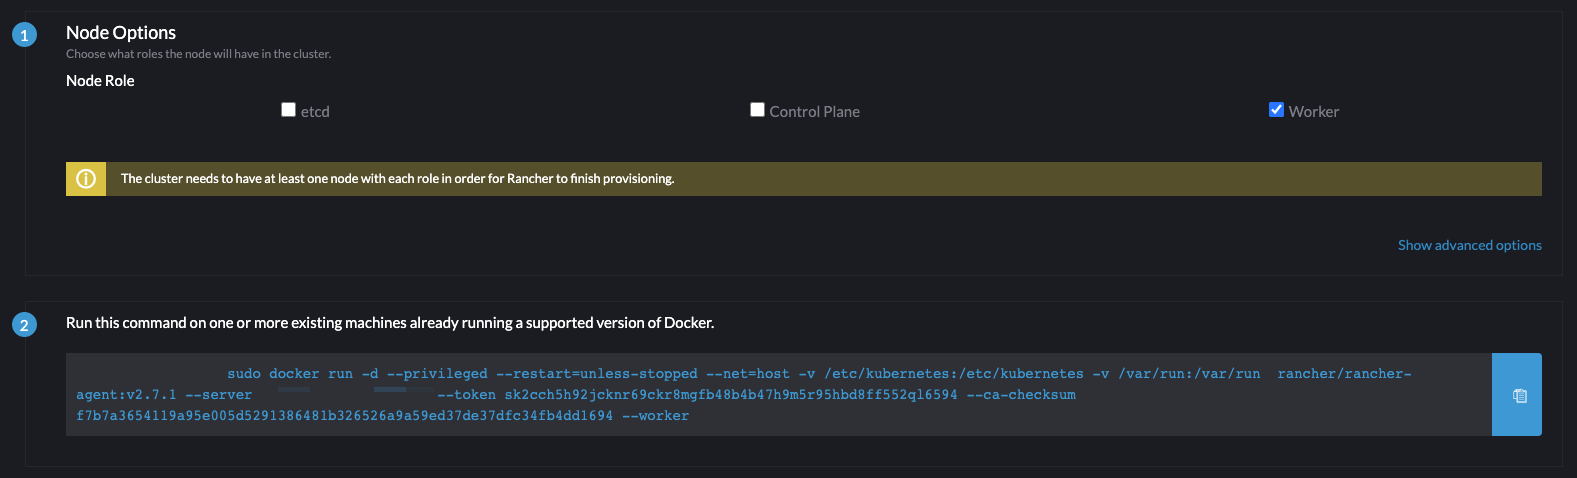
To register your master node, make sure this box is checked (Worker). Click on the command to copy to your clipboard and paste it into the terminal with your SSH session to the worker node.