
Have you been searching for a platform to host your code, and build your DevOps workflow and processes all in one place? Why not use GitLab for CI/CD pipelines? GitLab lets you host your application code and use the GitLab CI CD feature to continuously test, build and deploy your application on every code change.
Table of Contents
- Prerequisites
- Initializing a GitLab Project
- Configuring Jobs on GitLab
- Securing Credentials by Creating Secret Variables
- Building and Pushing a Docker Image to Docker Hub
- Configuring Stages on the GitLab CI CD pipeline
Prerequisites
- A GitLab account, a repository already set up, and a personal access token.
- A Docker Hub account and a repository.
Initializing a GitLab Project
Before configuring a CI/CD pipeline on GitLab, you must first have a repository on GitLab that houses your application. This tutorial uses a Python flask application to illustrate GitLab CI CD in action.
Clone the following repo:
1
git clone https://gitea.ochoaprojects.com/brandon/gitlab-devop-scripts.git
Once cloned, open the directory containing your files from your root directory and open it up with your preferred code editor.
Next, run the command below to spin up flask run the flask application.
1
flask run
The output below indicates that the flask application is entirely functional and error-free.

Lastly, push the application up to your GitLab repository.
Configuring Jobs on GitLab
After initializing your GitLab project, you’ll need a way to execute tasks on your CI/CD pipeline. How? By configuring Jobs where you define tasks in a YAML file.
You’ll write the CI/CD pipeline as code in a YAML file, which GitLab will use to perform the CI/CD pipeline for your project.
There are two options involved when creating the YAML file:
- Create, and push the file in your project directory locally from your machine alongside the pipeline configurations to your remote GitLab repository.
- Create the file directly on your GitLab repository via the GitLab UI.
In this example, you’ll create the YAML file directly on your GitLab repository via the GitLab UI:
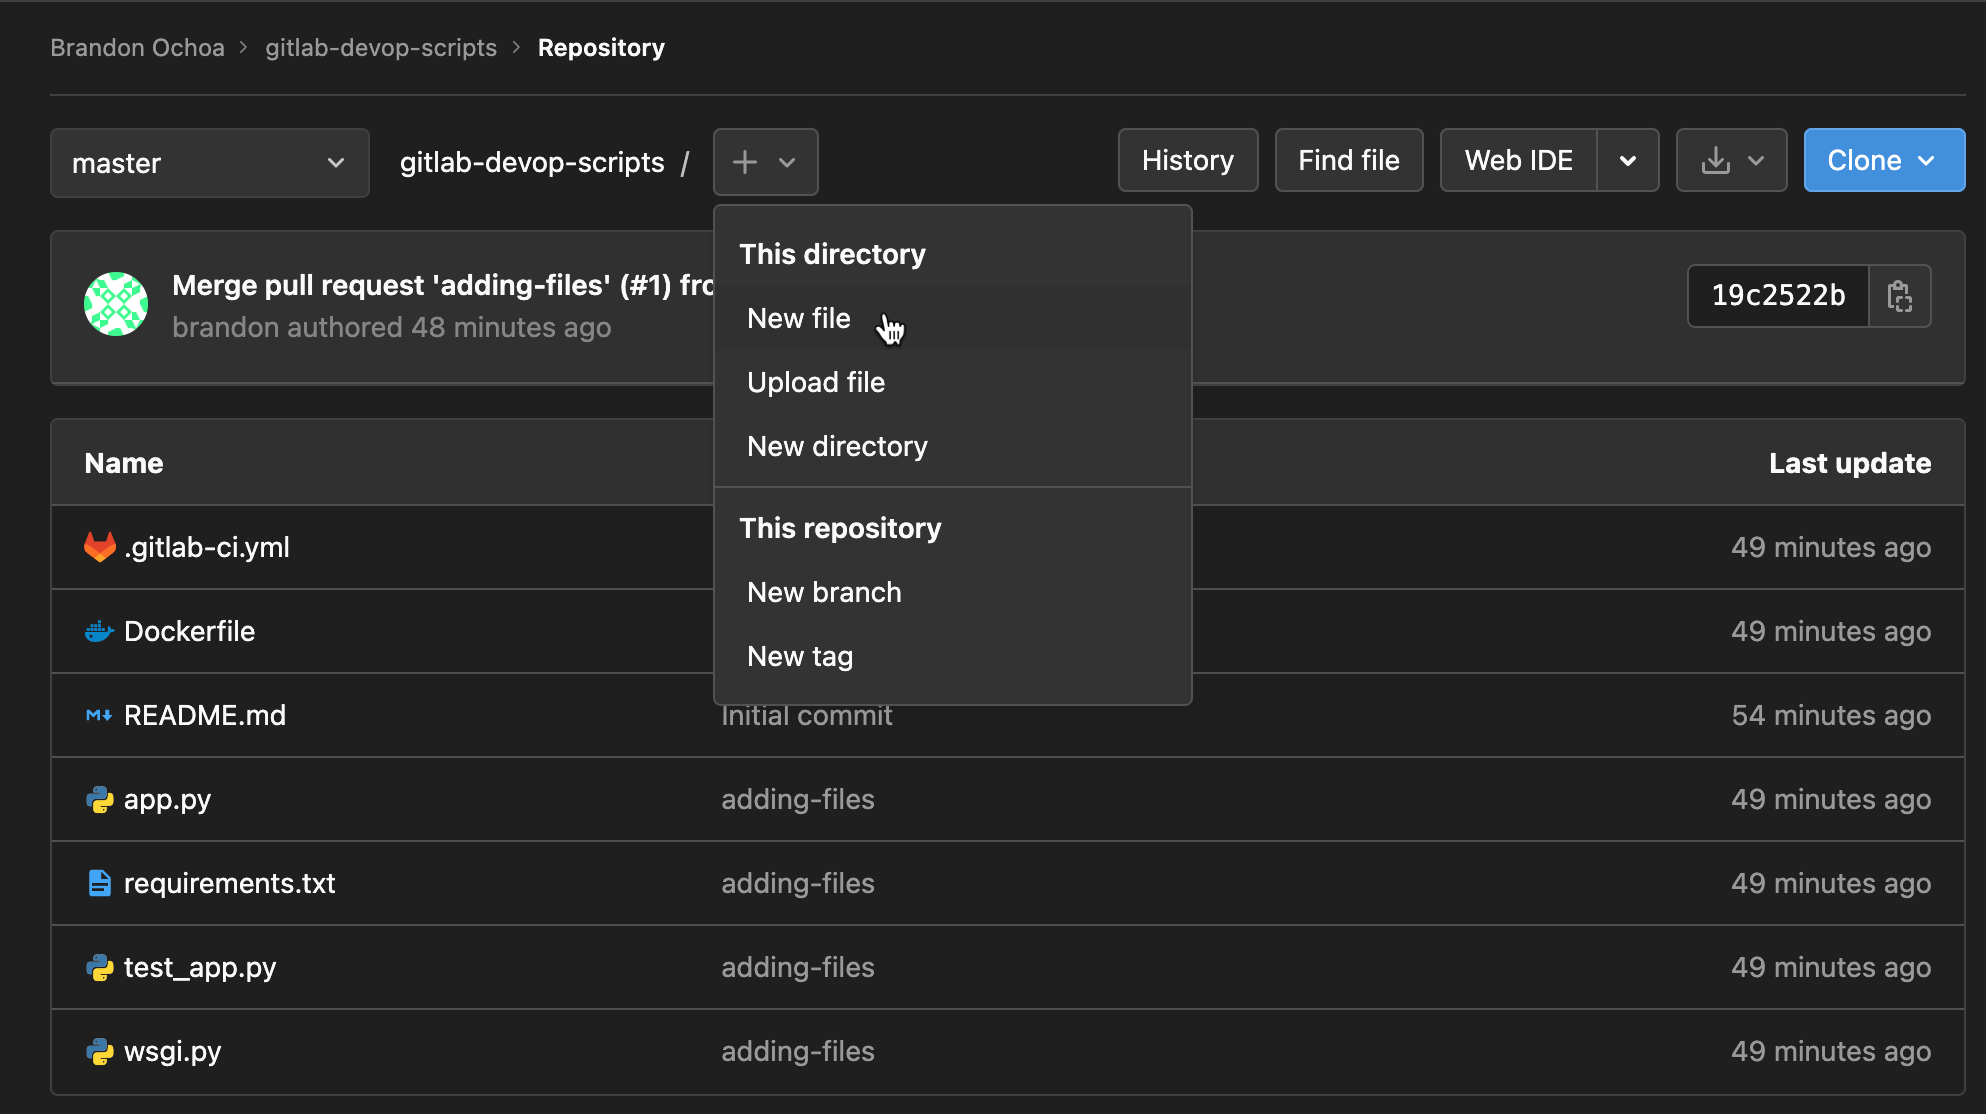
Click on the (+) icon shown below in your project’s root directory of your GitLab repository to initialize creating the (.gitlab-ci.yaml) file. Your browser redirects to a page where you can configure the new YAML file (step two).
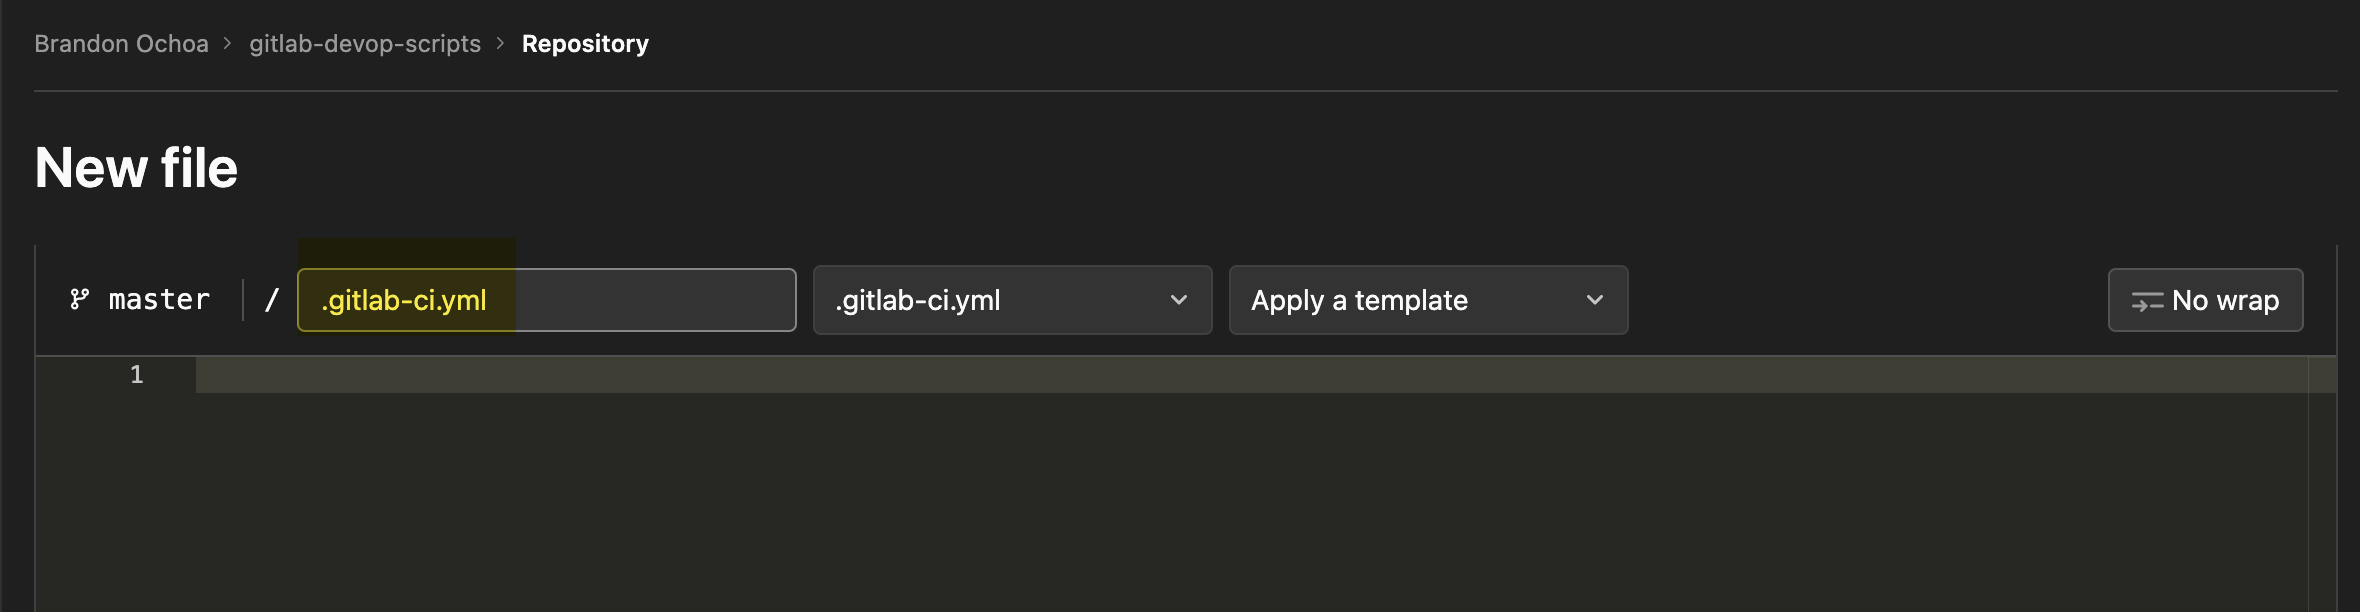
Next, type in .gitlab-ci.yml in the input field with the filename placeholder, as shown below.
Add the code snippets below to the .gitlab-ci.yml file, which runs the test for the Python flask application.
1
2
3
4
5
6
7
8
9
10
11
12
13
run_tests:
    # Use GitLab-managed runner with a python:3.9-slim-buster image to run the job
    image: python:3.9-slim-buster
    before_script:
        # Update the system package index
        - apt-get update
        # Install Python3 and pip
        - apt-get install -y python3-dev python3-pip
        # Install Flask and pytest
        - pip3 install Flask pytest
    script:
        # Run the pytest command to run the test for the Python flask application.
        - pytest
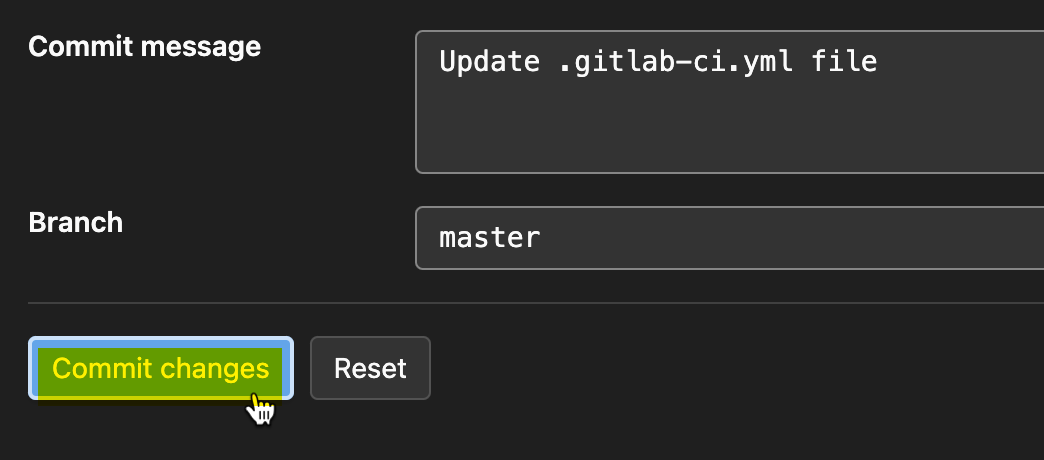
Now, scroll down to the page’s bottom, and click on the Commit changes button to commit the changes. Doing so makes GitLab detect the pipeline configuration code and run the job.
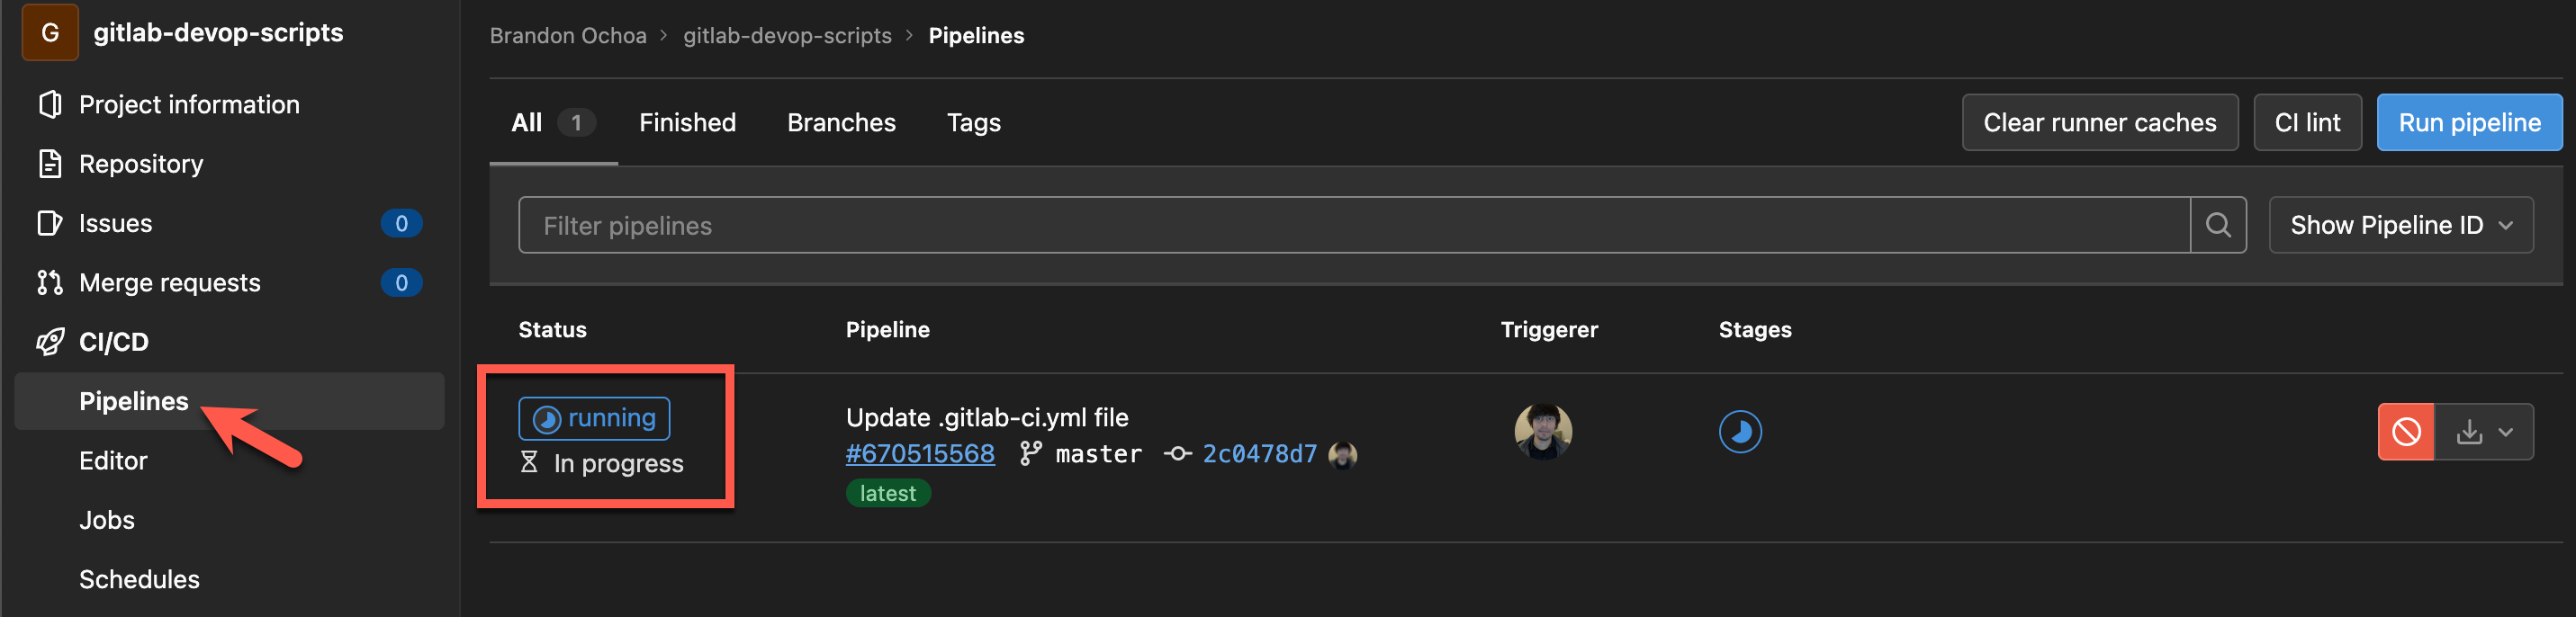
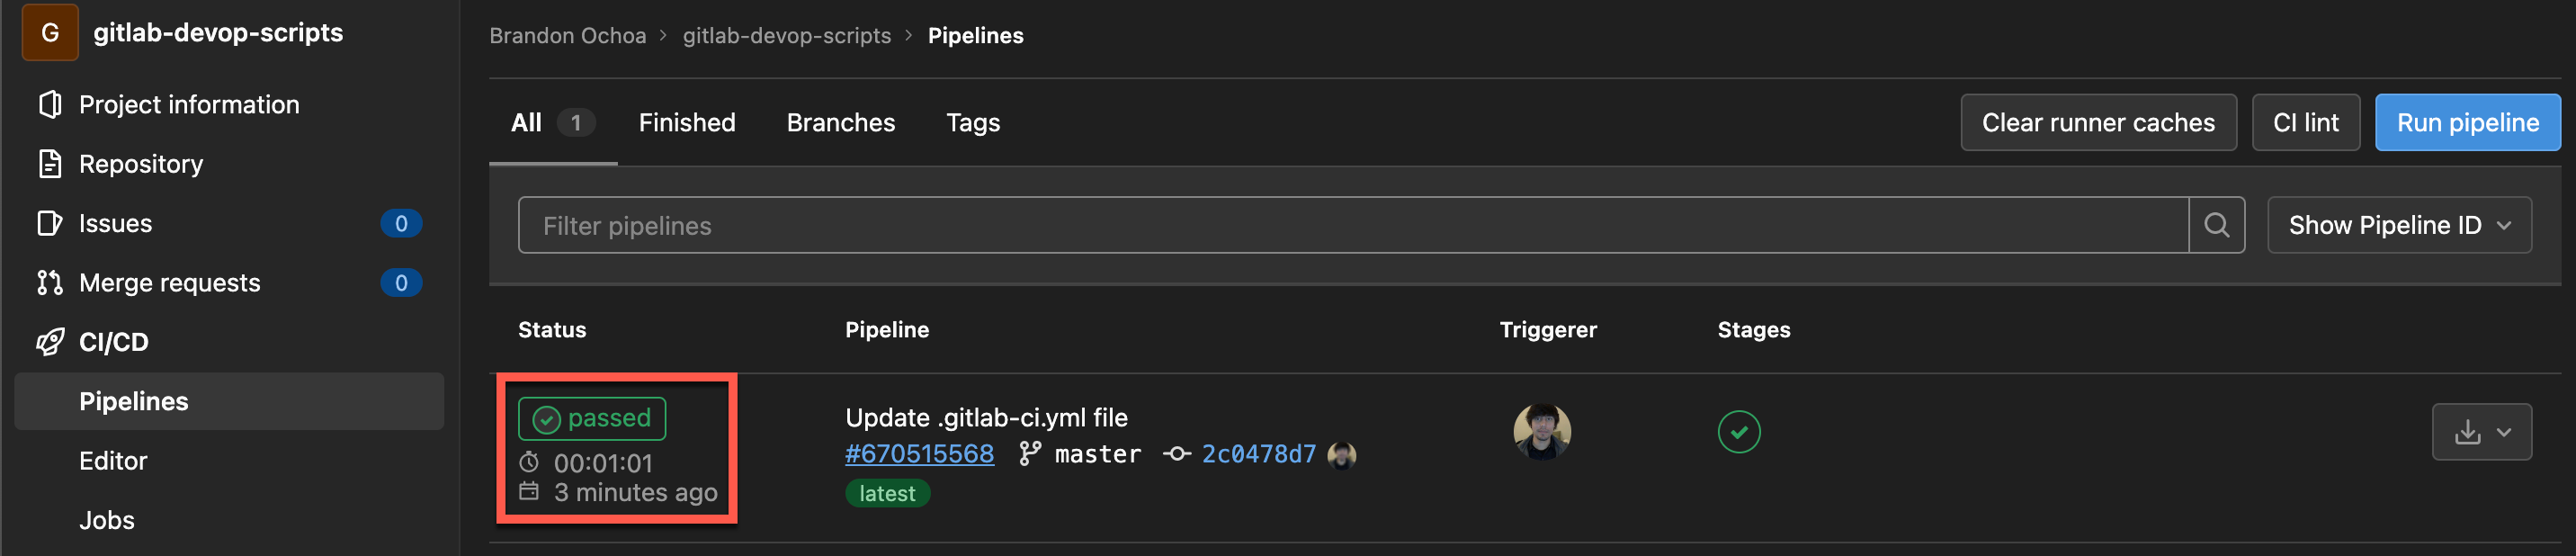
Lastly, navigate to the CI/CD section (left panel), and click on the Pipelines tab to view your pipeline.
You’ll see that the pipeline is currently in running status, as shown below.
Once executed successfully, your pipeline’s status changes to passed, which indicates your job ran successfully.
Securing Credentials by Creating Secret Variables
You’ve just successfully executed your first job. And now, you’re almost ready to build and push the Docker image for the Python flask project to both Docker Hub and GitLab container registries.
But first, you’ll need a way to store your login credentials for Docker Hub and GitLab securely. What’s that secure way? You’ll create secret variables to hold these credentials and keep them away from public eyes.
Navigate to Settings (left panel), and click on the CI/CD tab, as shown below, to create a secret variable using GitLab project variables.

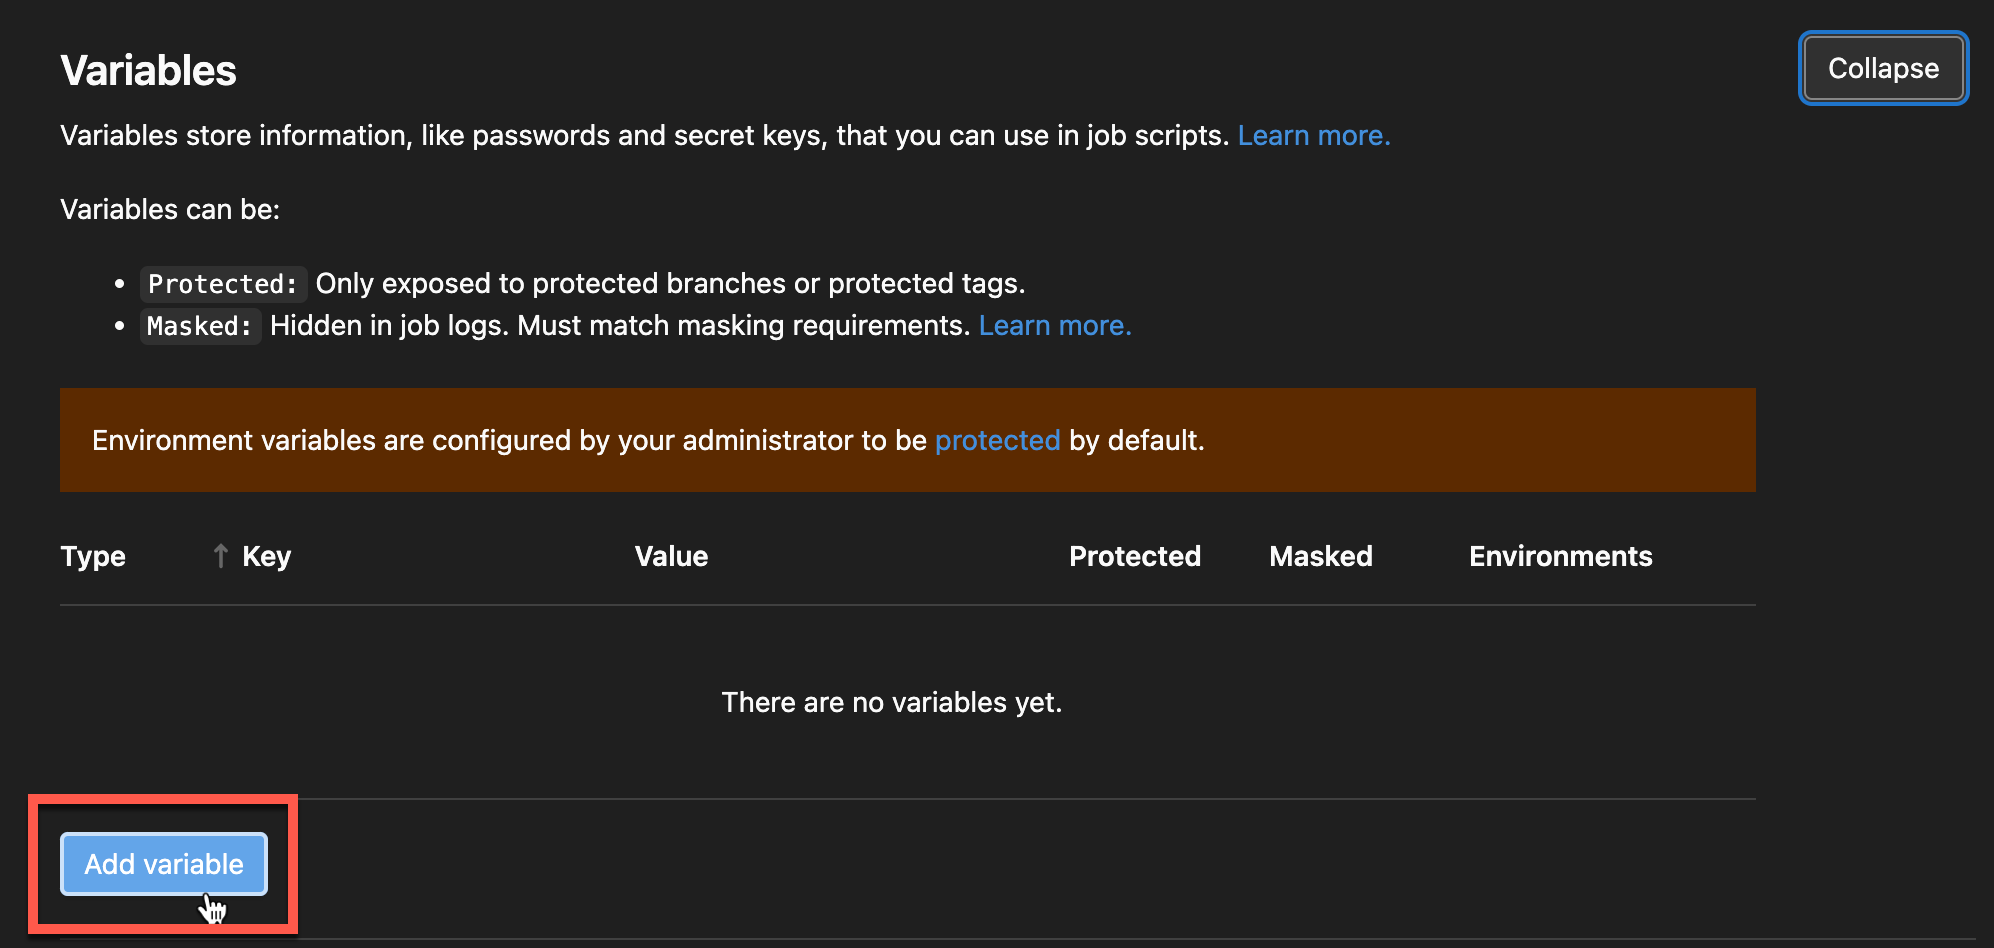
Next, scroll down on the new page, click on the Variables sub-section, and click Expand (top-right of the section) to expand the Variables section.

Once expanded, click Add variable (bottom-left) to add a secret variable.
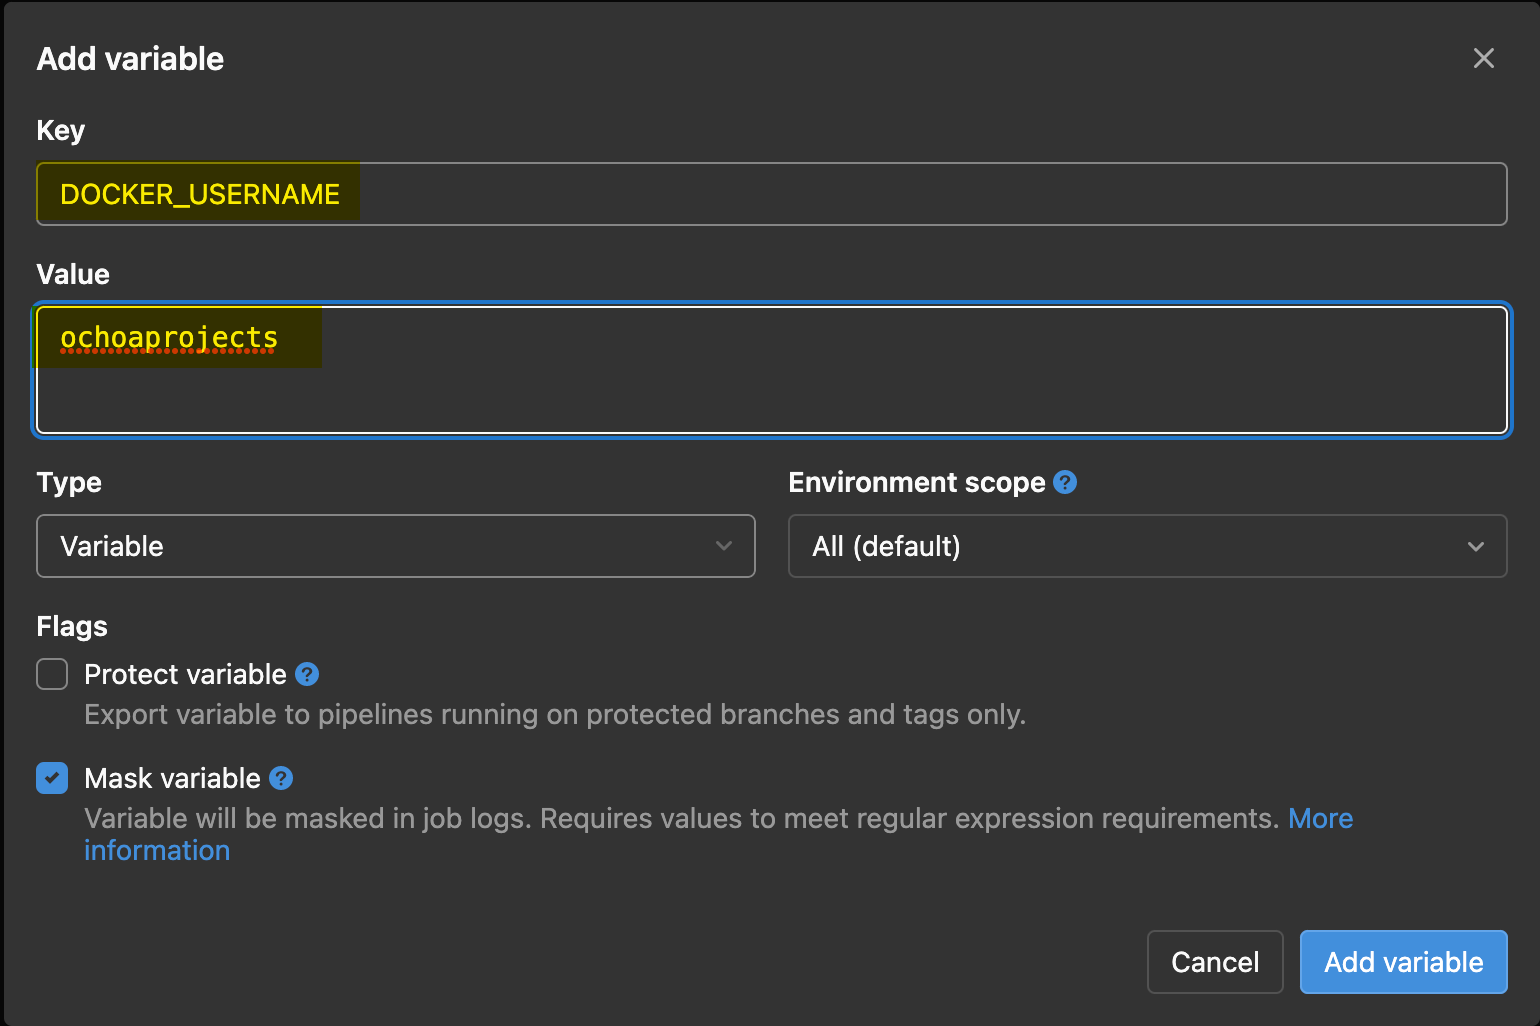
Now, configure the new secret variable with the following:
Key– DOCKER_USERNAMEValue– Input your Docker Hub username.
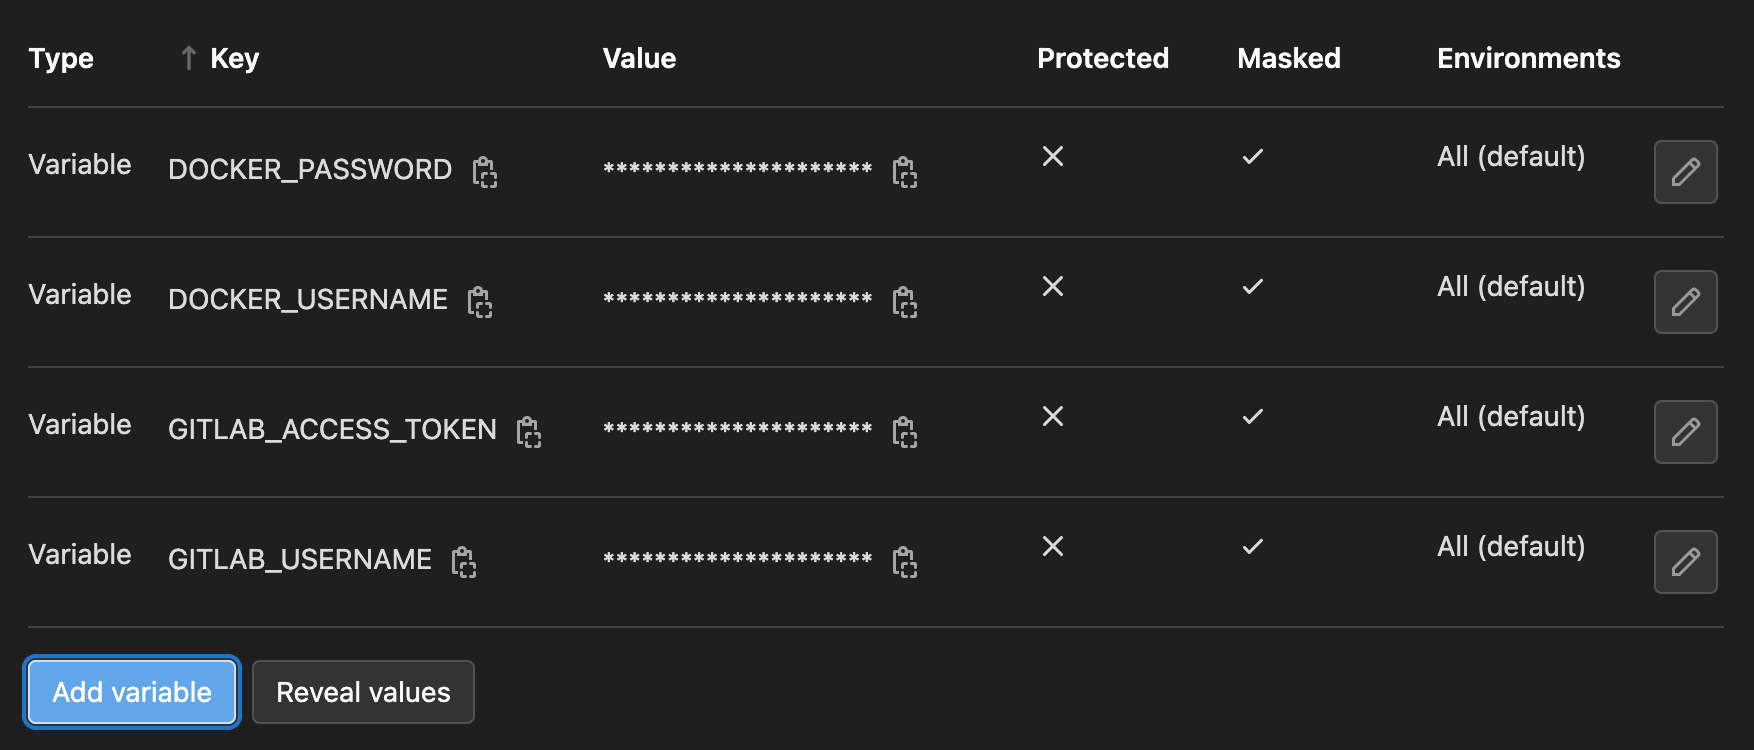
Finally, repeat step four, and add more variables with the following details:
Key– DOCKER_PASSWORDValue– Provide your Docker Hub password.Key- GITLAB_USERNAMEValue- Input your GitLab username.Key– GITLAB_ACCESS_TOKENValue– Input your GitLab access token.
You should now have four secret variables, as shown below.
Building and Pushing a Docker Image to Docker Hub
With your secrets kept a secret, it’s time to configure your second job. This job will build and deploy a Docker image for the Python flask application to Docker Hub.
Navigate to the CI/CD Pipeline Editor as you’ll need to add configurations to the pipeline.
Next, add the following code at the top of the run-test block. Be sure to replace dockerhub-user with your Docker Hub username.
1
2
3
variables:
    IMAGE_NAME: <dockerhub-user>/flask-app
    IMAGE_TAG: flask-app-1.0

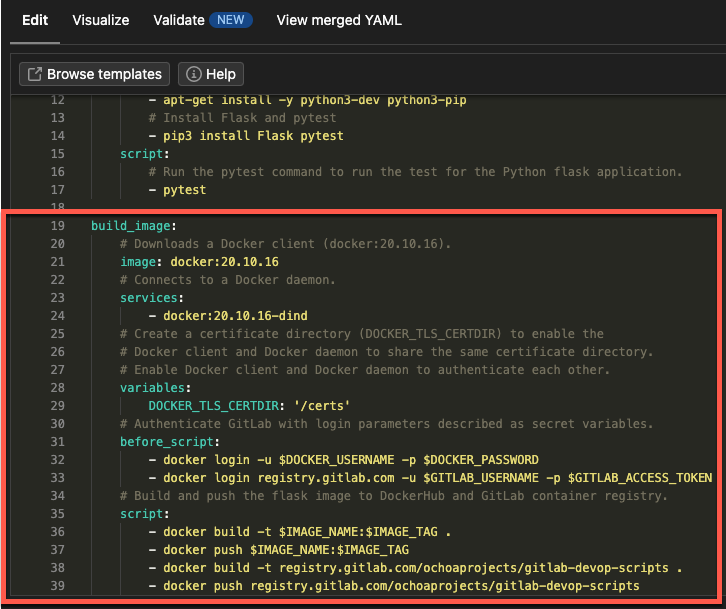
Add the following code below the run_test block, which builds a Docker image for the Python flask application. Be sure to replace gitlab-user with your GitLab username and project-name (in this example, mine is “gitlab-devop-scripts”) in the script block.
1
2
3
4
5
6
7
8
9
10
11
12
13
14
15
16
17
18
19
20
21
build_image:
    # Downloads a Docker client (docker:20.10.16).
    image: docker:20.10.16
    # Connects to a Docker daemon.
    services:
        - docker:20.10.16-dind
    # Create a certificate directory (DOCKER_TLS_CERTDIR) to enable the
    # Docker client and Docker daemon to share the same certificate directory.
    # Enable Docker client and Docker daemon to authenticate each other.
    variables:
        DOCKER_TLS_CERTDIR: '/certs'
    # Authenticate GitLab with login parameters described as secret variables.
    before_script:
        - docker login -u $DOCKER_USERNAME -p $DOCKER_PASSWORD
        - docker login registry.gitlab.com -u $GITLAB_USERNAME -p $GITLAB_ACCESS_TOKEN
    # Build and push the flask image to DockerHub and GitLab container registry.
    script:
        - docker build -t $IMAGE_NAME:$IMAGE_TAG .
        - docker push $IMAGE_NAME:$IMAGE_TAG
        - docker build -t registry.gitlab.com/gitlab-user/project-name .
        - docker push registry.gitlab.com/gitlab-user/project-name
Now, click on Commit changes again to save the changes, and trigger the updated pipeline.
You should now have the following output, which indicates your build is successful.

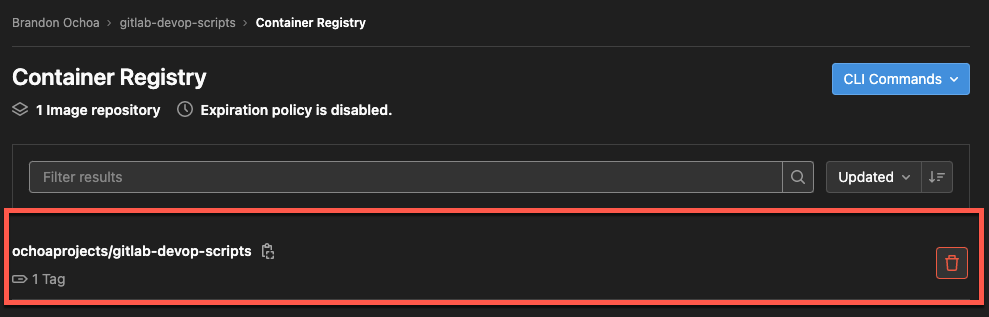
We should also now see that our container registry push was successful by navigating to Package and registries > Container Registry and the following output will be shown below.
Navigate to the Packages & Registries (left panel) → Container Registry to confirm your Python flask image has been pushed to the GitLab container registry, as shown below.
Finally, switch to your Docker account and verify your Python flask application has been pushed to your Docker Hub registry.

Configuring Stages on the GitLab CI CD pipeline
Currently, each job in your pipeline is executed in isolation and running regardless of if any job is not successful, which is not good practice.
The best way to configure a pipeline is to make jobs execute accordingly, one after the other. With this behavior, if one job fails, other subsequent jobs will not execute.
Navigate to the Pipeline Editor and add the following code below the variables block in your pipeline.
The code below adds stages to the pipeline, referenced from jobs in the pipeline.
1
2
3
stages:
    - test
    - build
Reference the stages in both the run_test and build_image blocks, as shown below.

Lastly, commit your changes to the pipeline, and navigate to Pipelines under the CI/CD section (left panel).
If all goes well, you’ll see each job executed one after the other in the Stages column, as shown below.
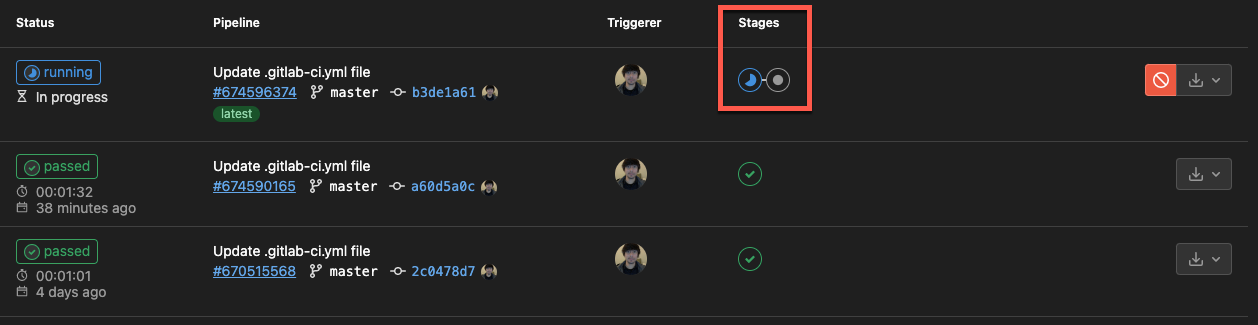
Once the run_tests job is done executing successfully, the build job begins immediately.

When the build job is executed successfully, you’ll see the following output showing two green checks under the Stages column.
