
Session Manager is the useful AWS tool that you might not be thinking about. If you’ve ever run something like ProxMox you understand just how handy it is to be able to click “console” for any of your VMs and instantly be transported to that VM as if you were sitting directly infront of the real deal with ease. This is “almost” that, but with a little more power in my opinon.
Table of Contents
- Create IAM Role
- Launch EC2 Instance
- Configure CloudWatch
- Install AWS CLI and AWS Session Manager Plugin
- Create IAM Policy and IAM User and IAM Group
- SSH to EC2 Instance
- Port Forward from EC2 to localhost
The Session Manager is part of the AWS Systems Manager and if you want to know more or read up on the offical documentation, that can be found here.
Create IAM Role
When you create an AWS account, you begin with one sign-in identity that has complete access to all AWS services and resources in the account. This identity is called the AWS account root user and is accessed by signing in with the email address and password that you used to create the account. It is strongly recommended that you do not use the root user for your everyday tasks. Safeguard your root user credentials and use them to perform the tasks that only the root user can perform.
In this procedure, you use the AWS account root user to create your first user in AWS Identity and Access Management (IAM). You add this IAM user to an Administrators group, to ensure that you have access to all services and their resources in your account. The next time that you access your AWS account, you should sign in with the credentials for this IAM user. As a best practice, create only the credentials that the user needs. For example, for a user who requires access only through the AWS Management Console, do not create access keys.
Click Create Role. 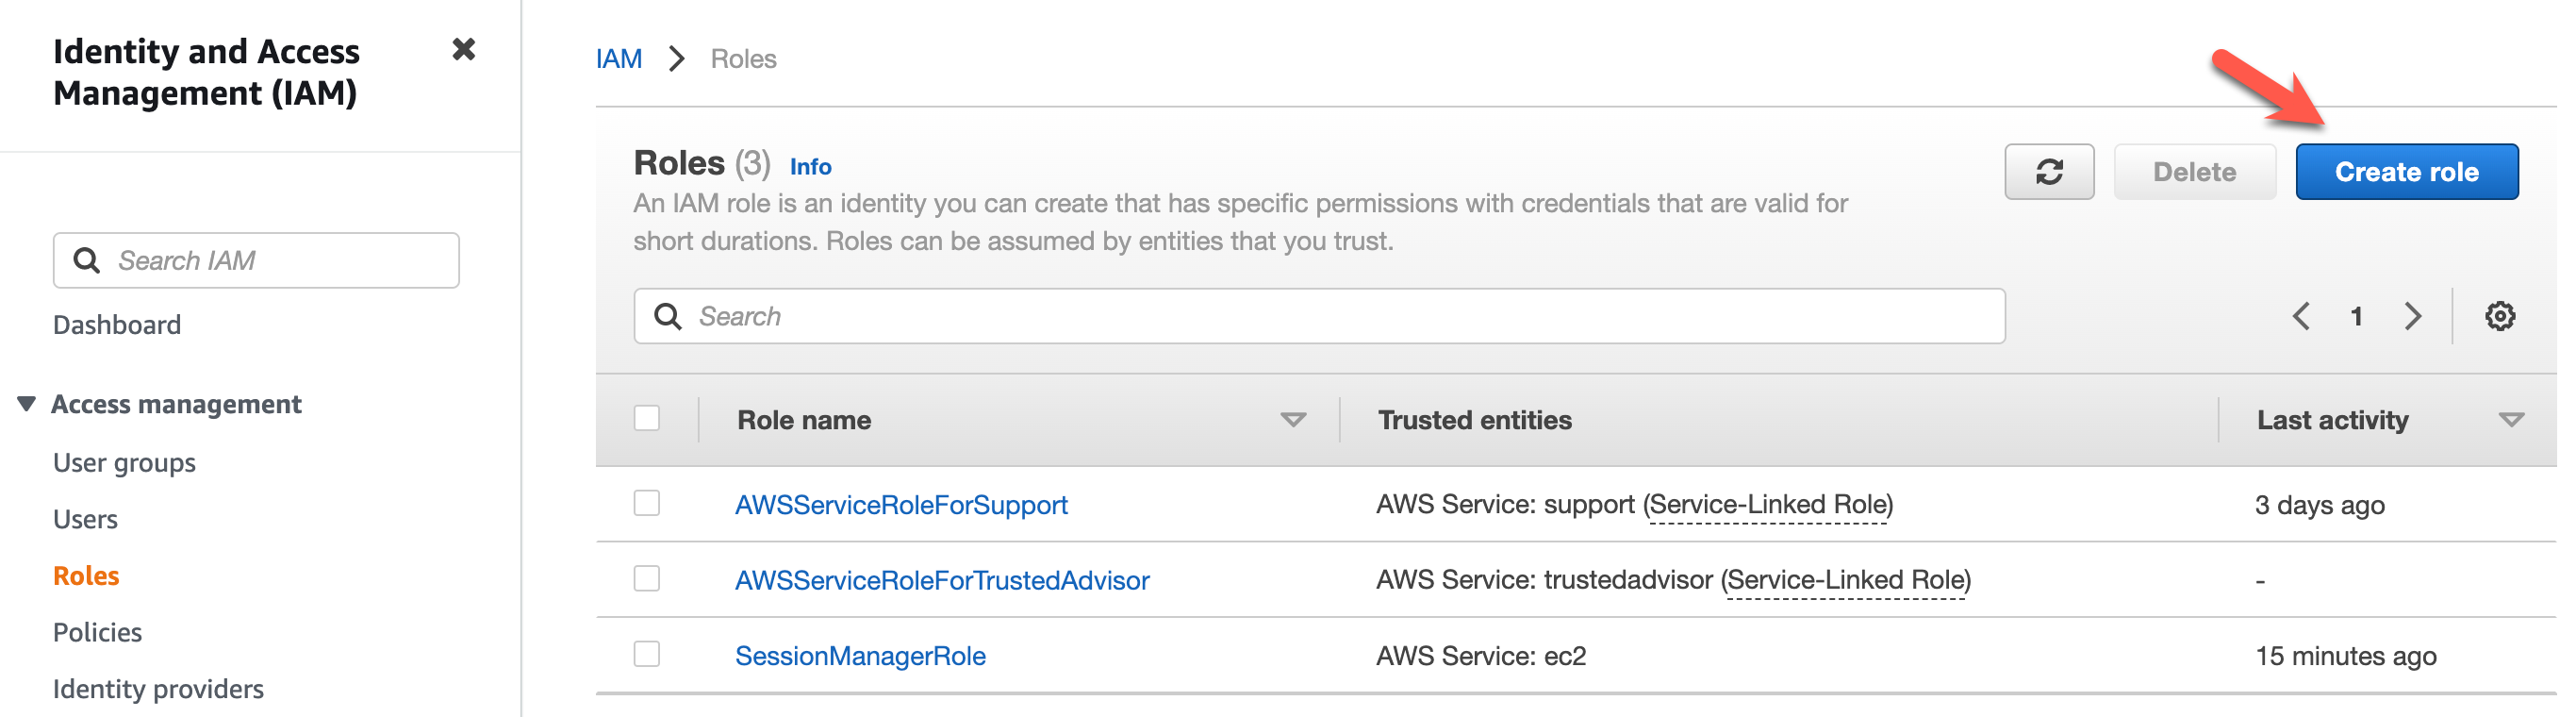
Select AWS Service and choose EC2 at the bottom. 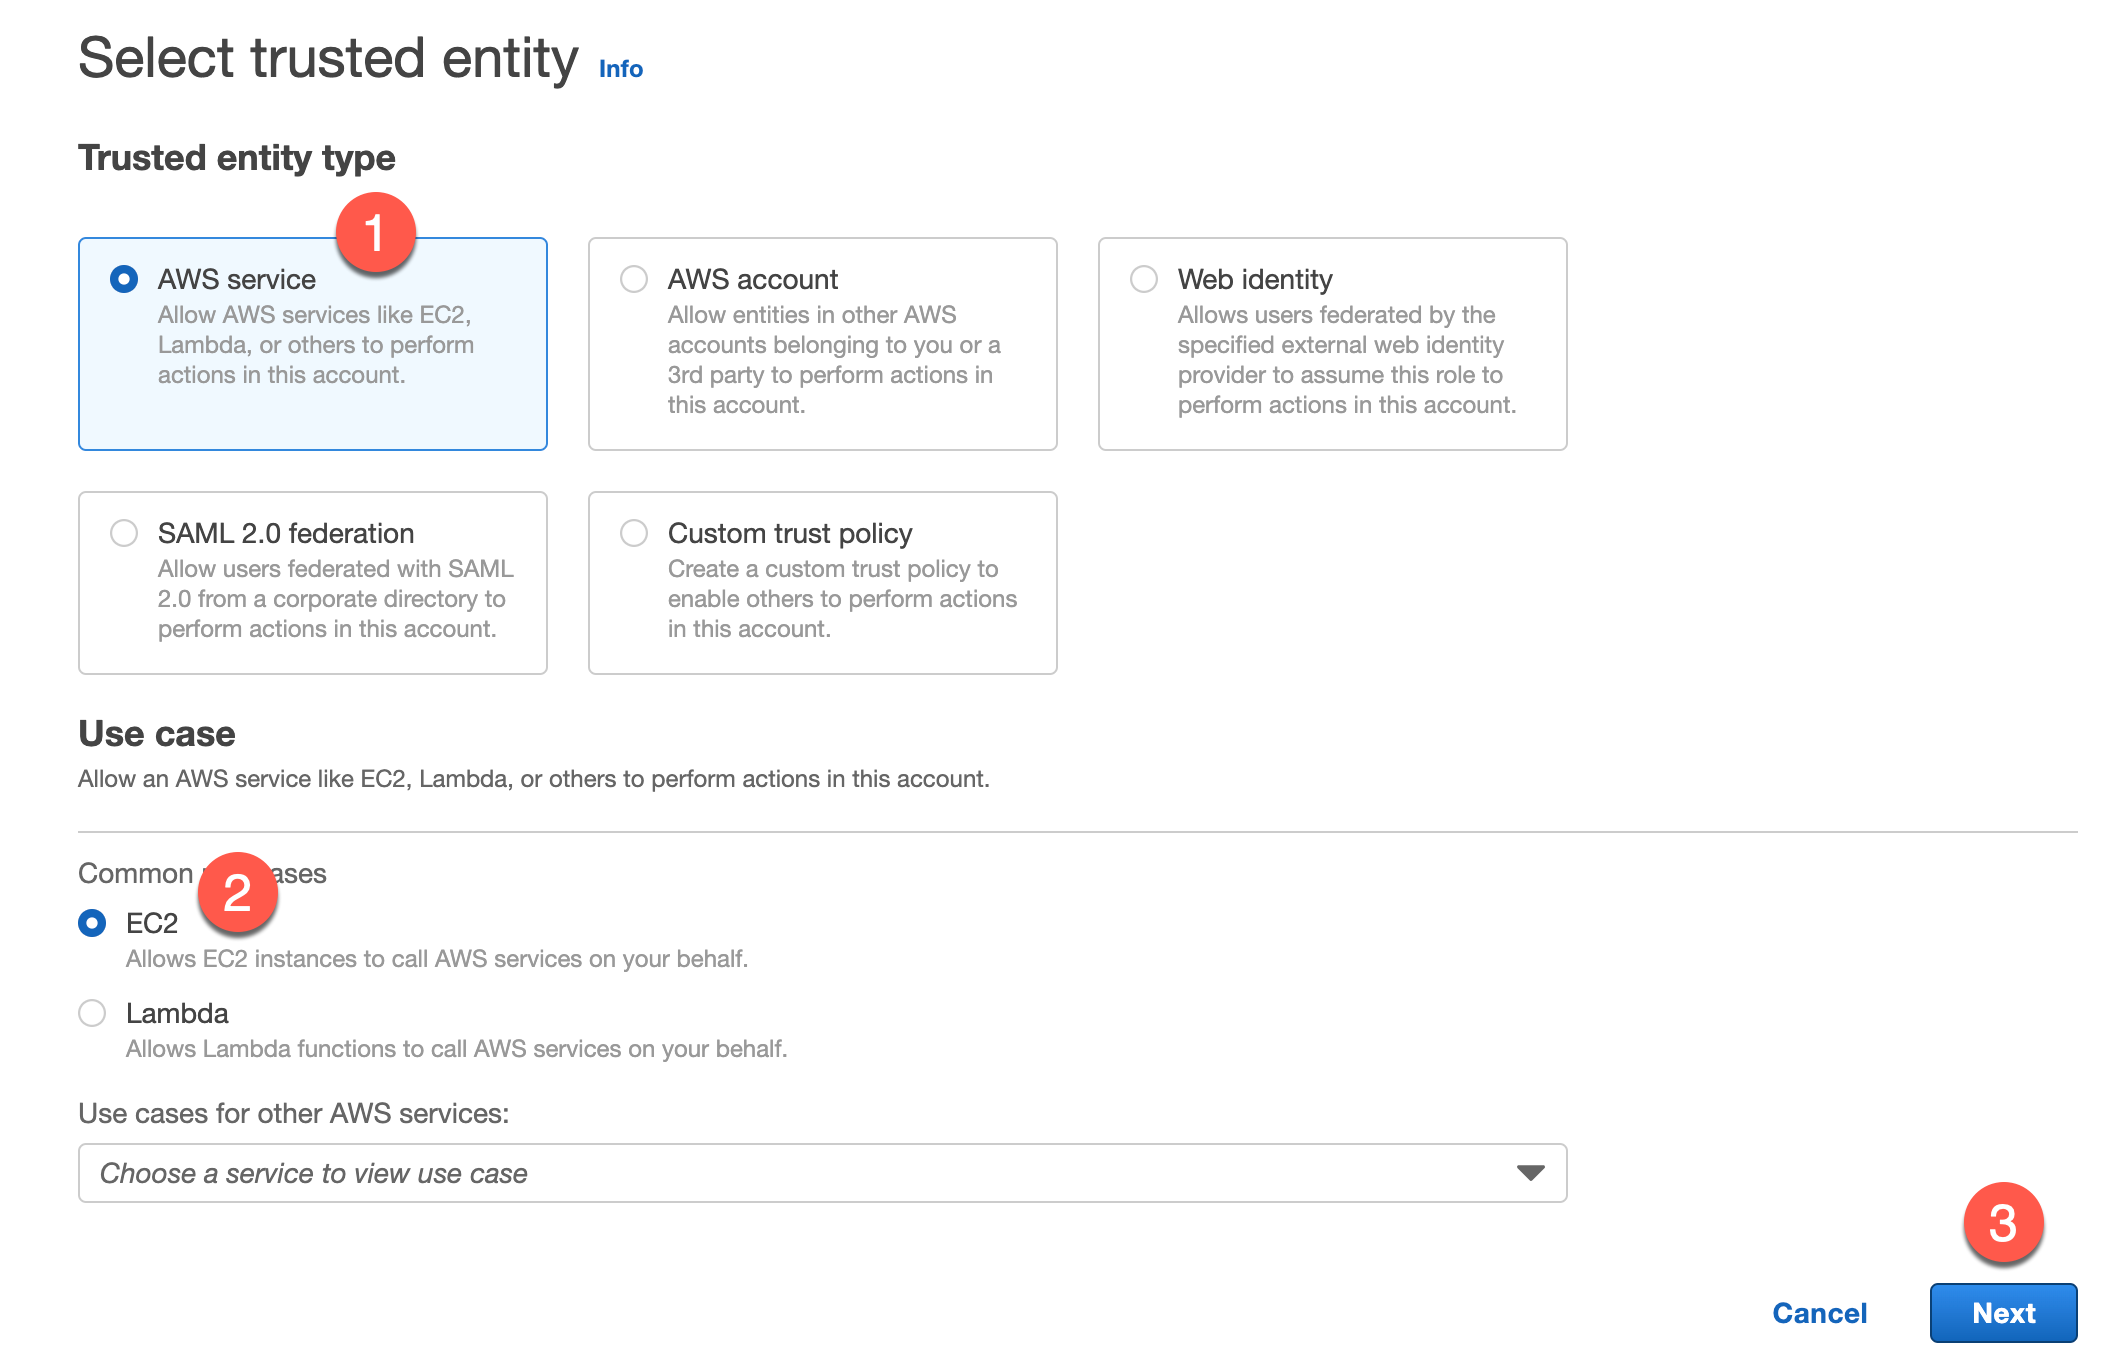
Search for “AmazonSSMFullAccess”, tick the box, click next. 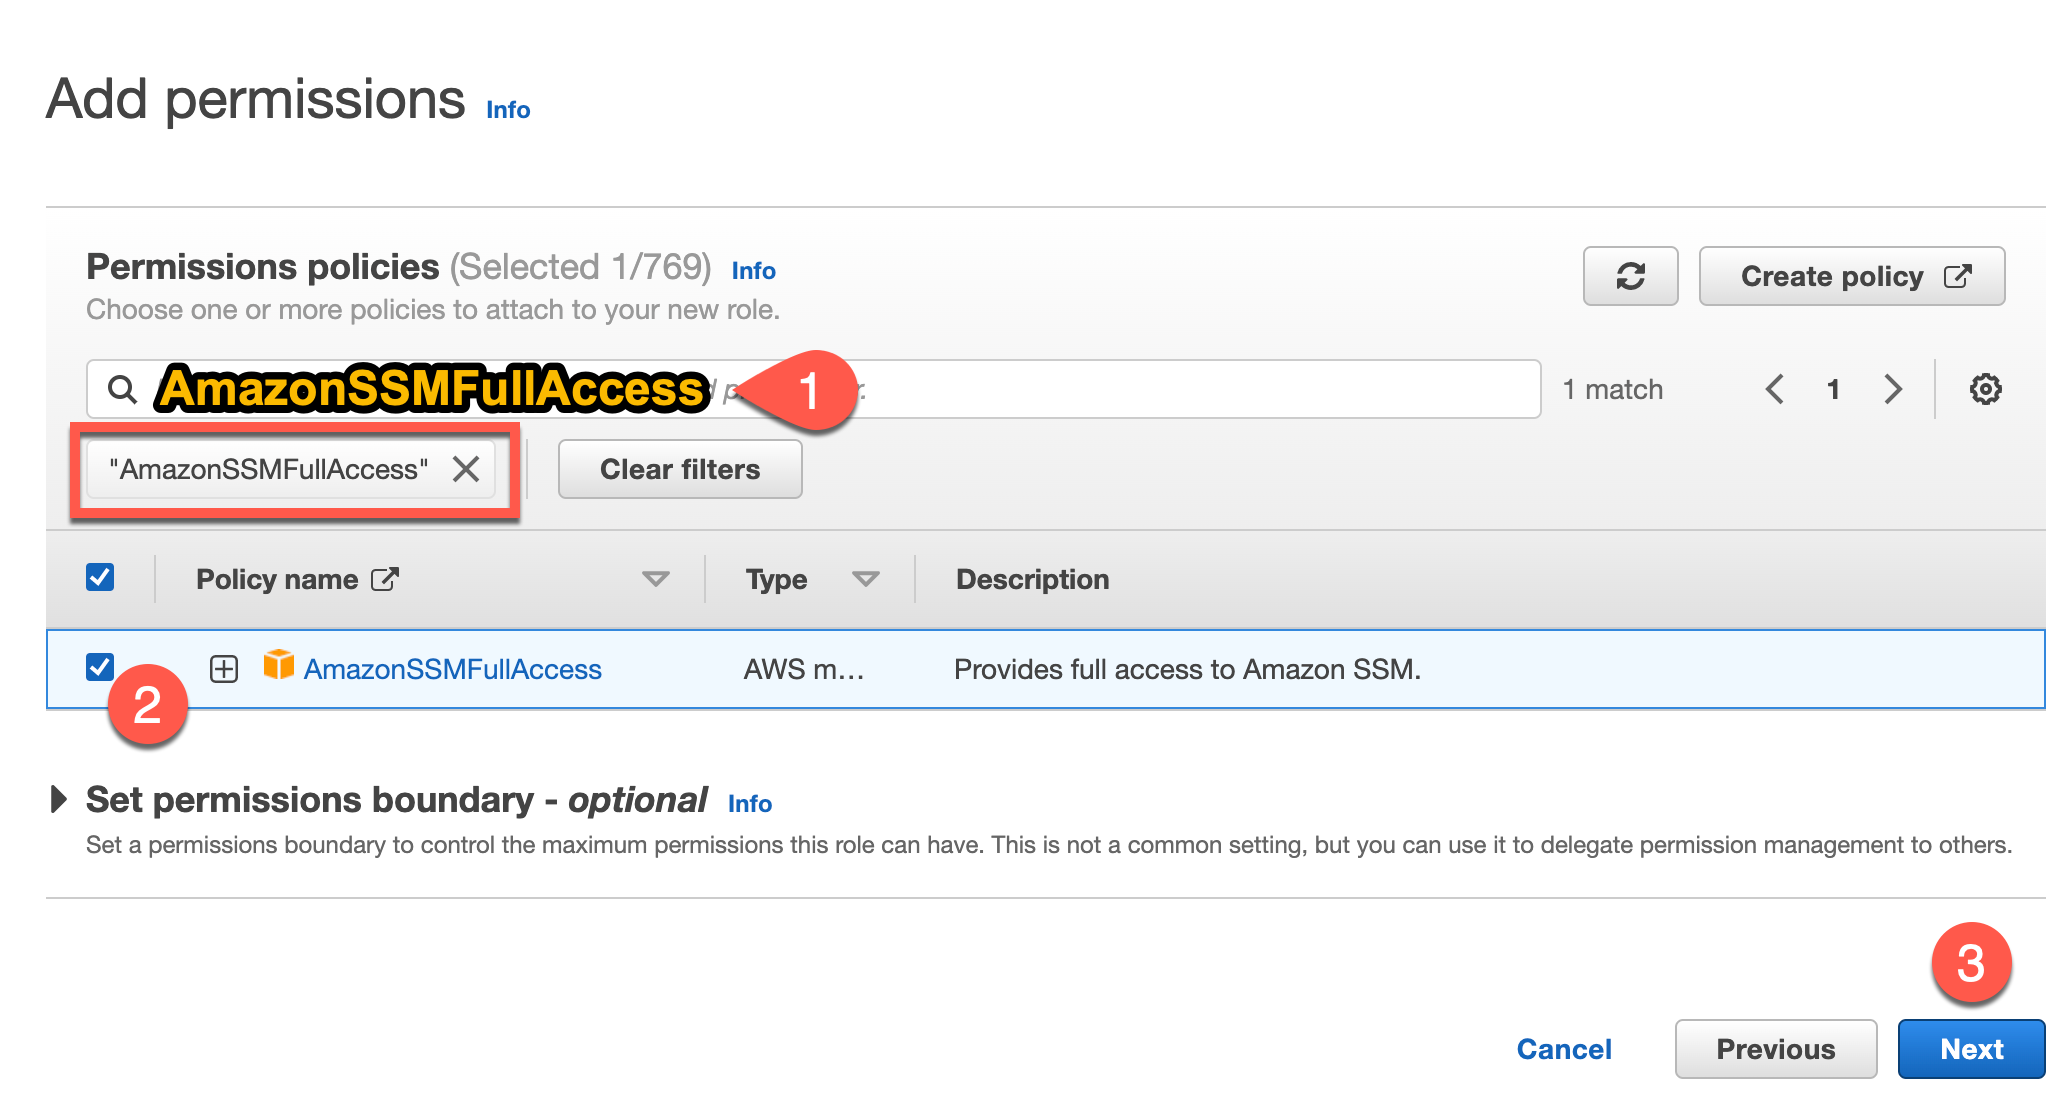
Give your role a name, review, and create it. 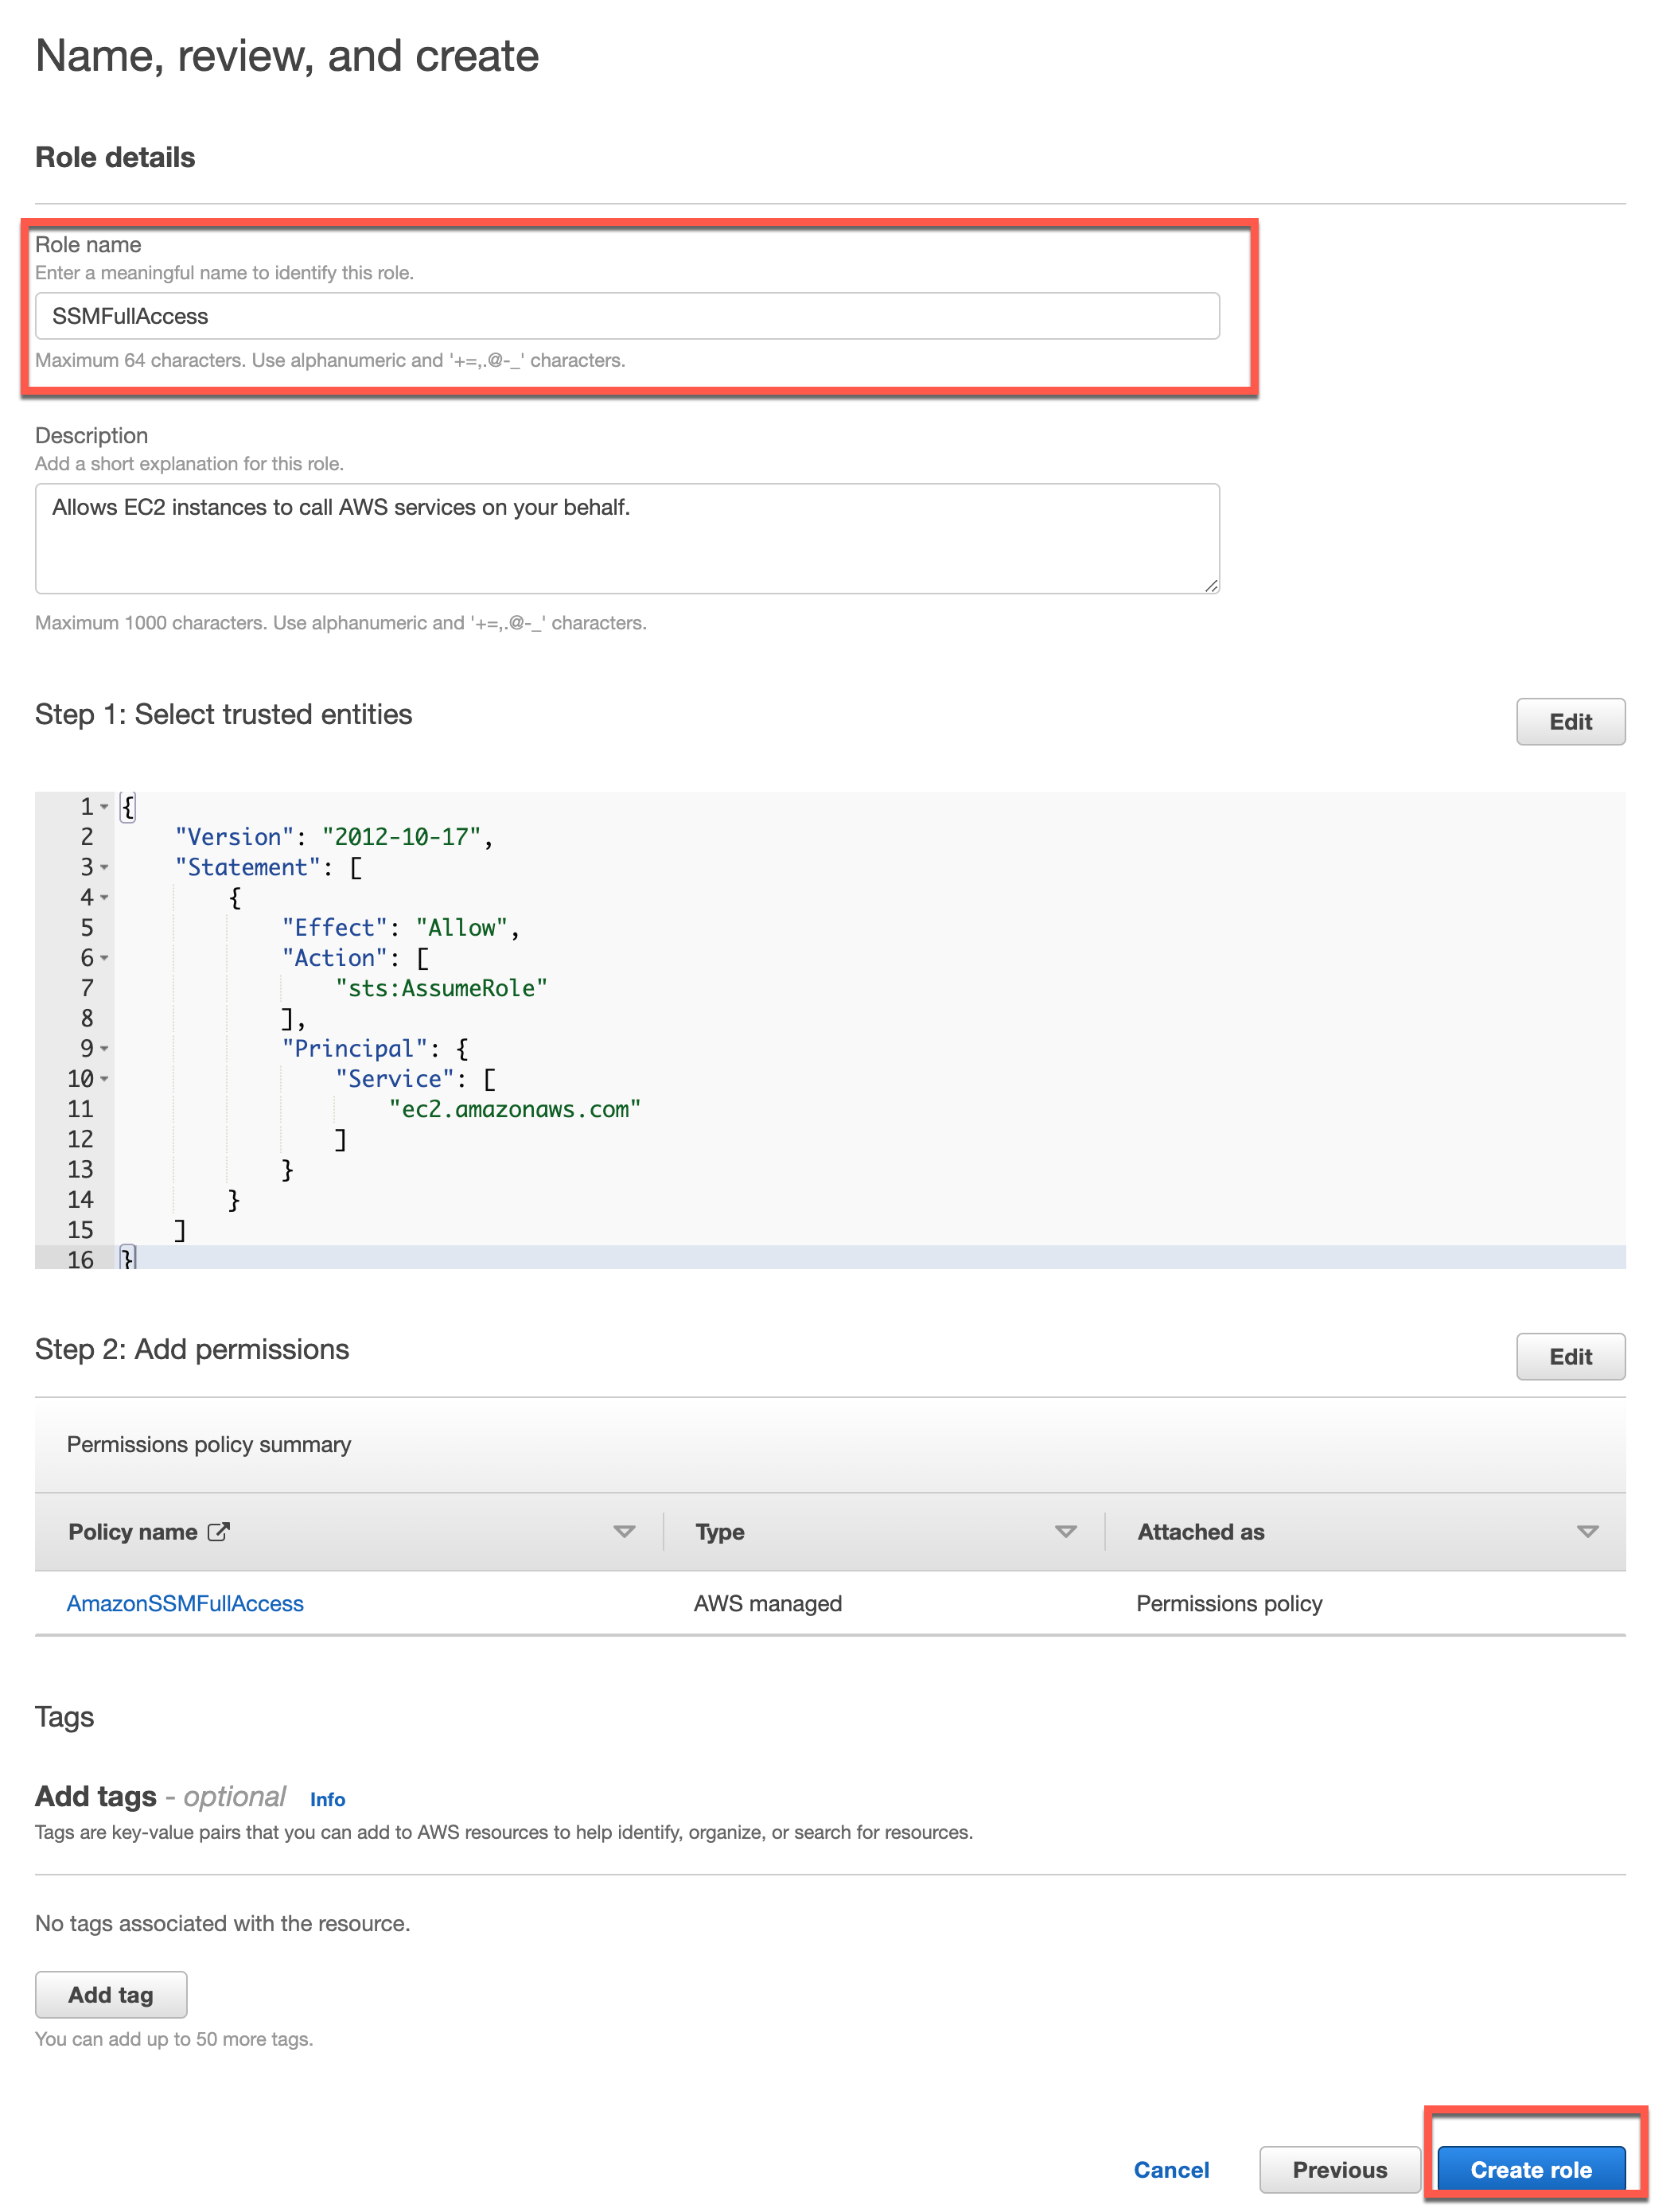
Launch EC2 Instance
AWS Systems Manager Agent (SSM Agent) is Amazon software that can be installed and configured on an EC2 instance, an on-premises server, or a virtual machine (VM). SSM Agent makes it possible for Systems Manager to update, manage, and configure these resources.
If the Amazon Machine Image (AMI) type you choose in the first procedure doesn’t come with SSM Agent preinstalled, manually install the agent on the new instance before it can be used with Systems Manager. If SSM Agent isn’t installed on the existing EC2 instance you choose in the second procedure, manually install the agent on the instance before it can be used with Systems Manager.
In most cases, SSM Agent is preinstalled on AMIs provided by AWS for the following operating systems (OSs):
- Amazon Linux Base AMIs dated 2017.09 and later
- Amazon Linux 2
- Amazon Linux 2 ECS-Optimized Base AMIs
- Amazon EKS-Optimized Amazon Linux AMIs
- macOS 10.14.x (Mojave), 10.15.x (Catalina), and 11.x (Big Sur)
- SUSE Linux Enterprise Server (SLES) 12 and 15
- Ubuntu Server 16.04, 18.04, and 20.04
- Windows Server 2008-2012 R2 AMIs published in November 2016 or later
- Windows Server 2016, 2019, and 2022
Navigate to EC2 > Instances and click “Launch Instances” in the top right hand corner and name your EC2 whatever you want. 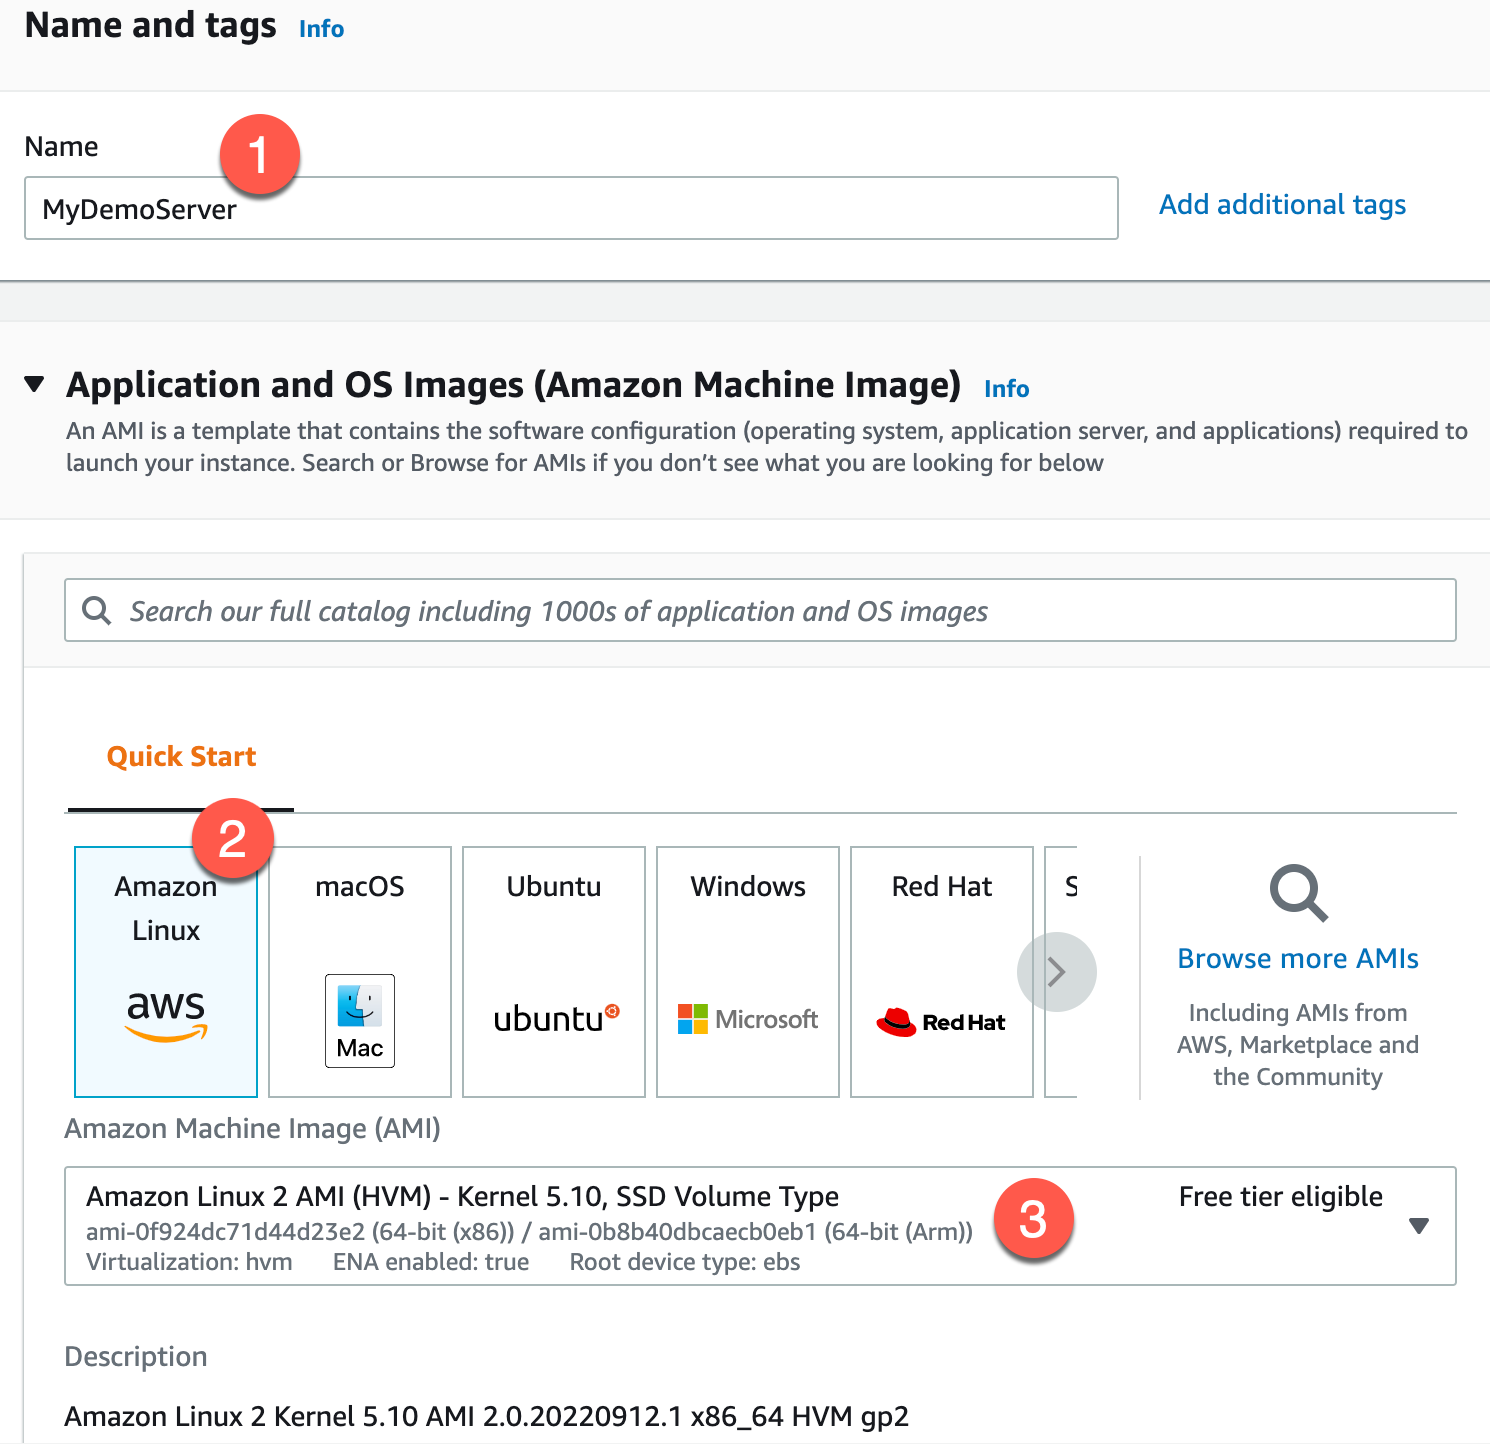
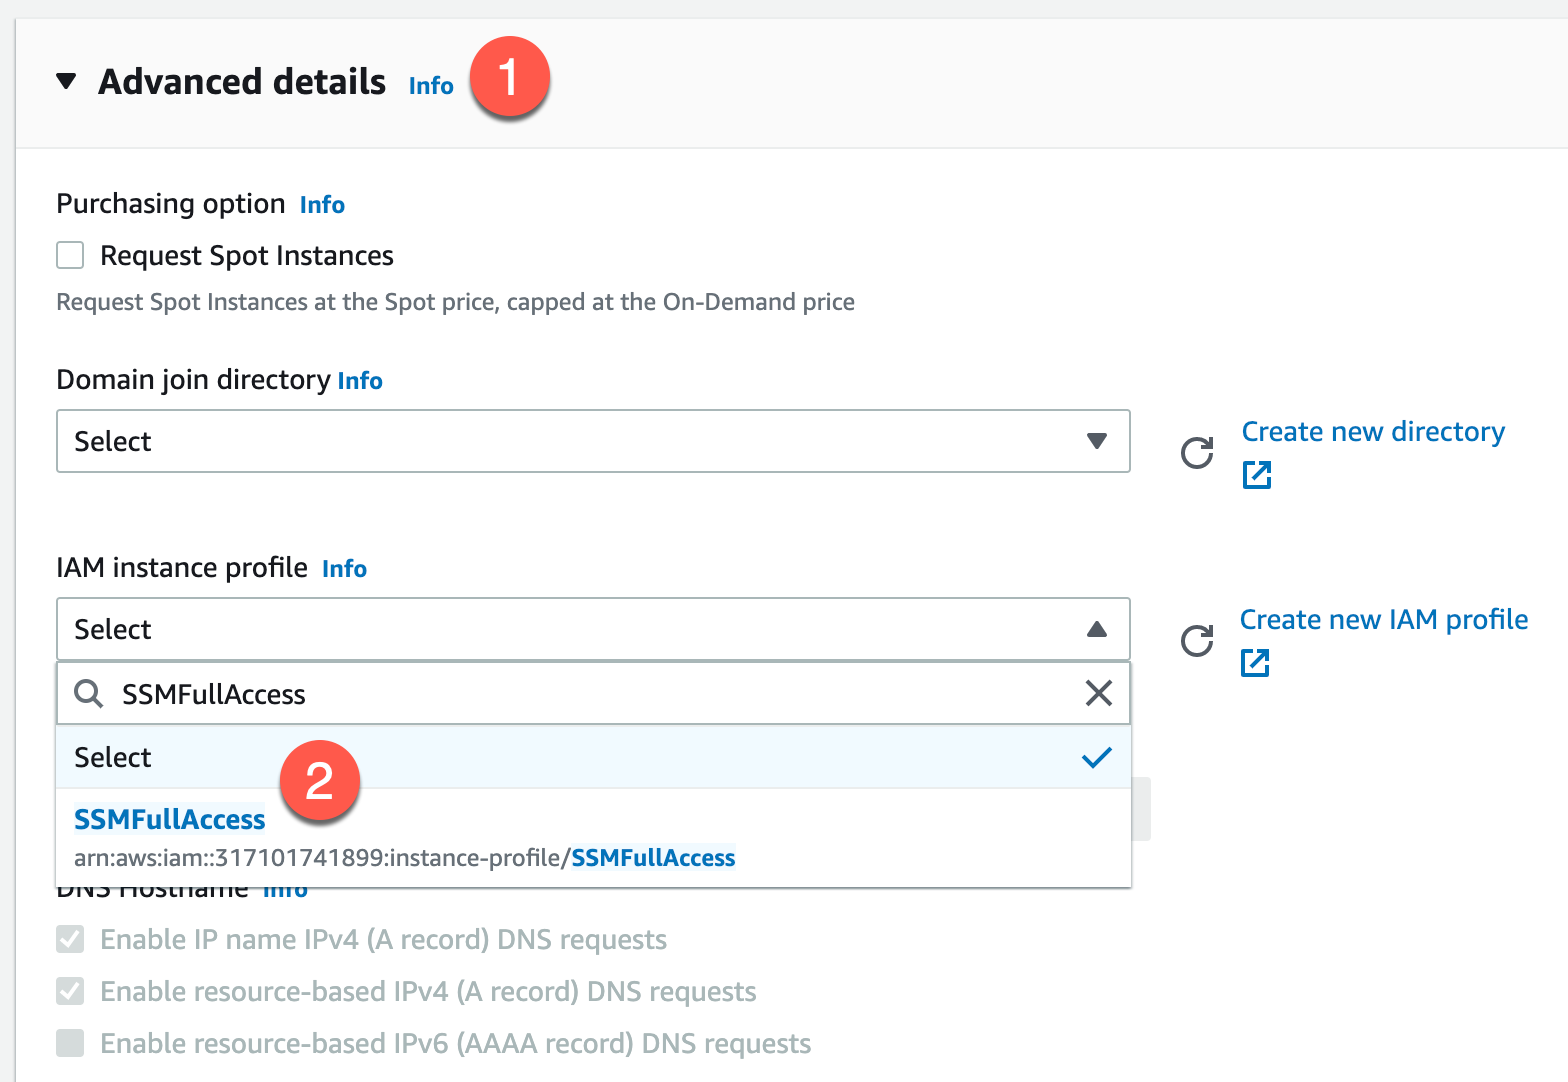
The defaults here should be good and keep you in a “Free Tier” for learning purposes. However, the most important part here is the Advanced details at the bottom of this page. Expanding this will reveal the IAM instance profile option. Click the drop down and choose the IAM Role we made earlier.
Now we simply launch our instance. 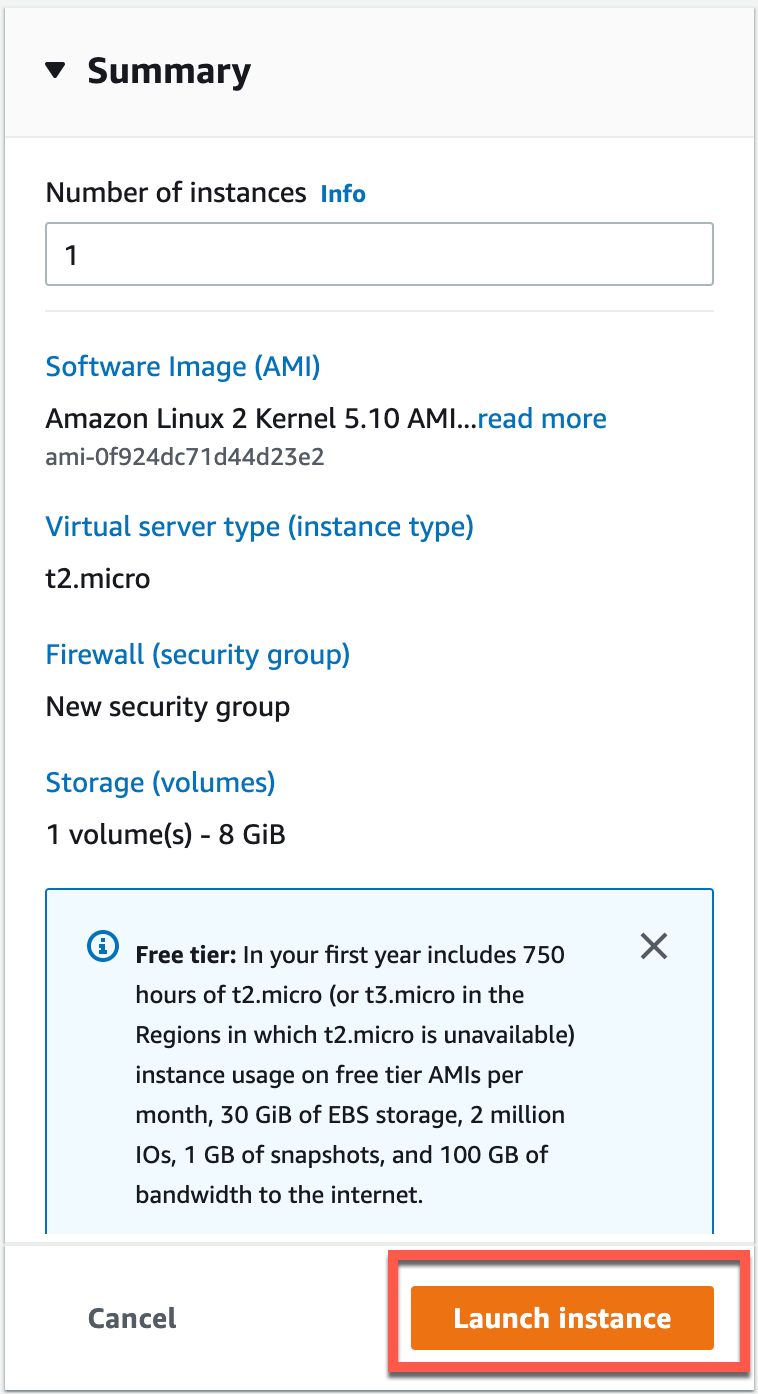
Since we are using the SessionManager to connect to this EC2 instance for this exmaple we are able to complete to proceed without using a key pair. 
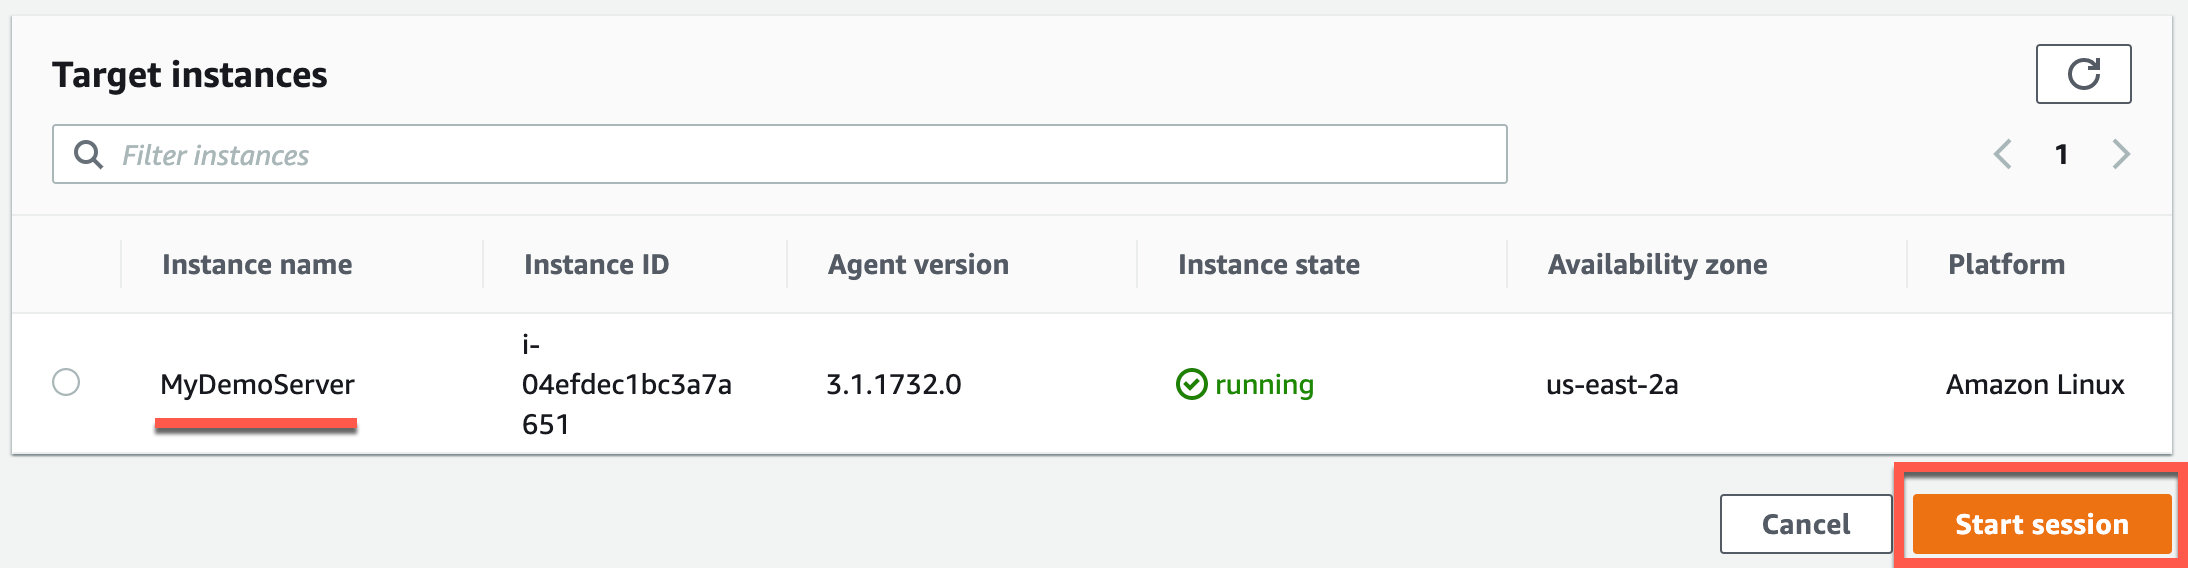
With what we have so far, it should be possible for us to head over to AWS Systems Manager > Session Manager within AWS console and click Start Session with the EC2 instance we just made. 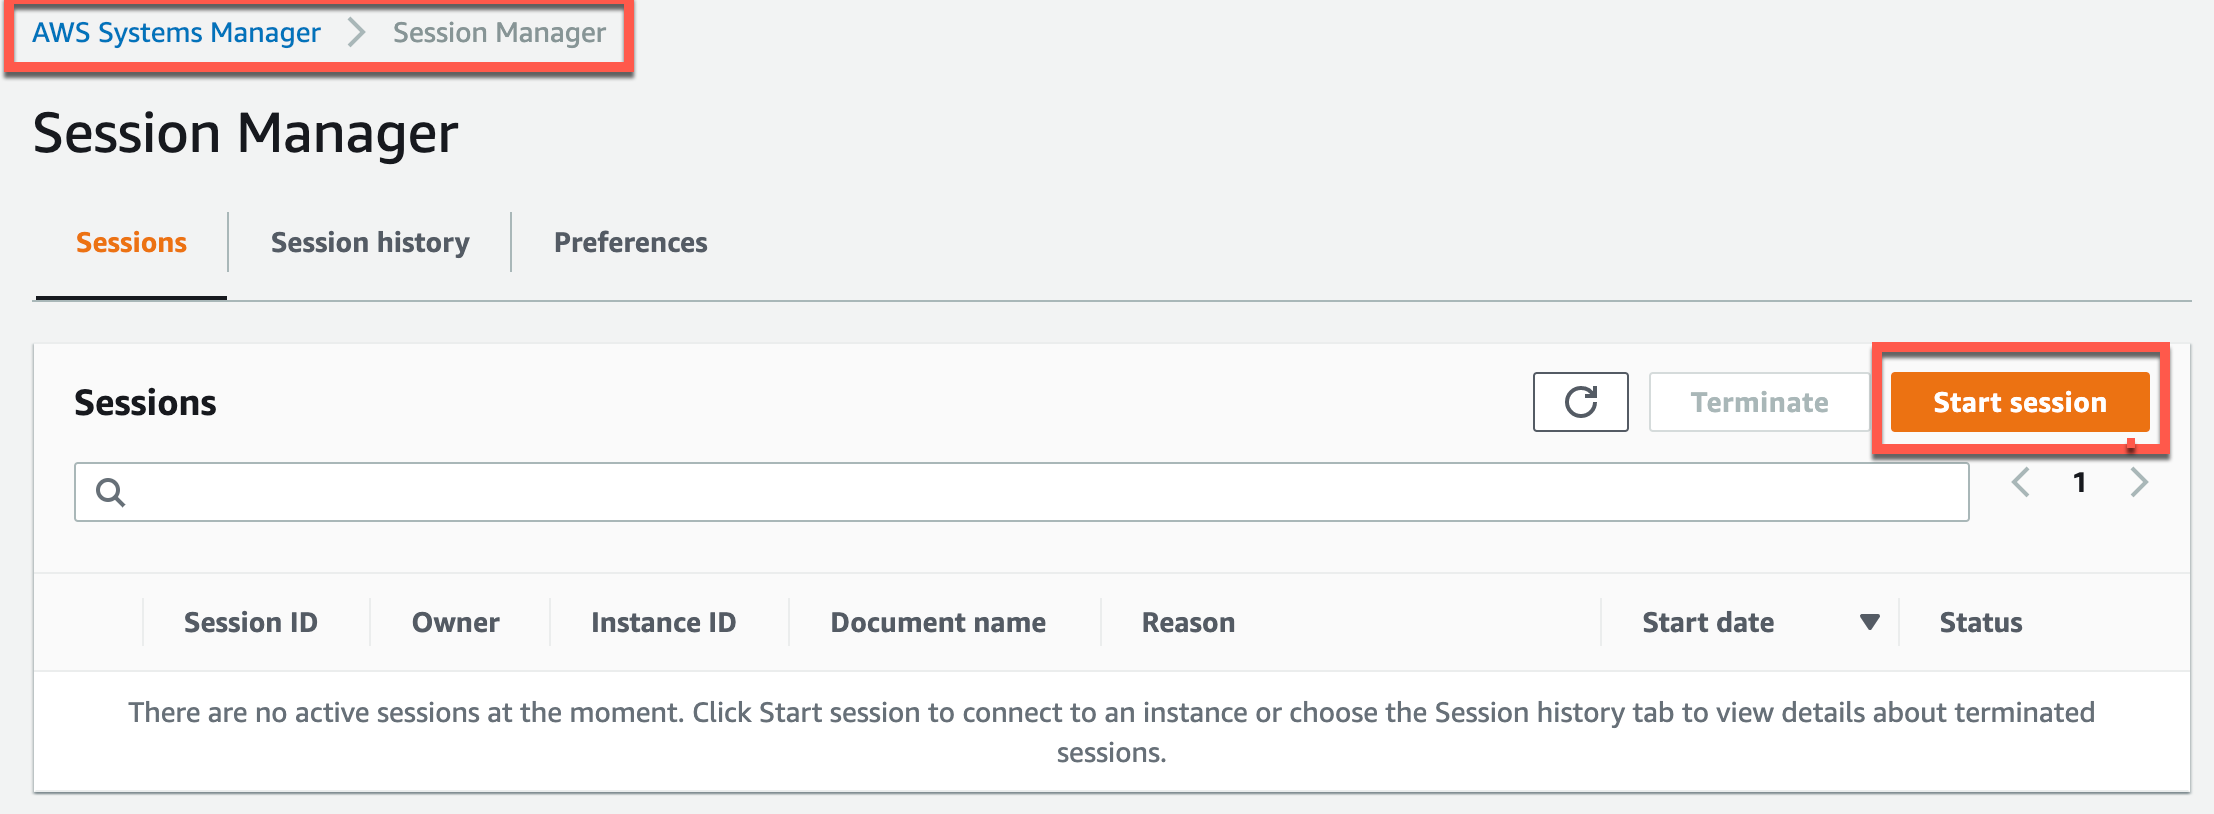

Configure CloudWatch
What is CloudWatch?– Amazon CloudWatch is a monitoring and observability service built for DevOps engineers, developers, site reliability engineers (SREs), IT managers, and product owners. CloudWatch provides you with data and actionable insights to monitor your applications, respond to system-wide performance changes, and optimize resource utilization. CloudWatch collects monitoring and operational data in the form of logs, metrics, and events. You get a unified view of operational health and gain complete visibility of your AWS resources, applications, and services running on AWS and on-premises. You can use CloudWatch to detect anomalous behavior in your environments, set alarms, visualize logs and metrics side by side, take automated actions, troubleshoot issues, and discover insights to keep your applications running smoothly.
This is an optional step but it is also very powerful. This will allow you to output your sessions as logs into CloudWatch so that you can review them later.
Start by going to Cloud Watch > Log Groups in the console and Create log group. 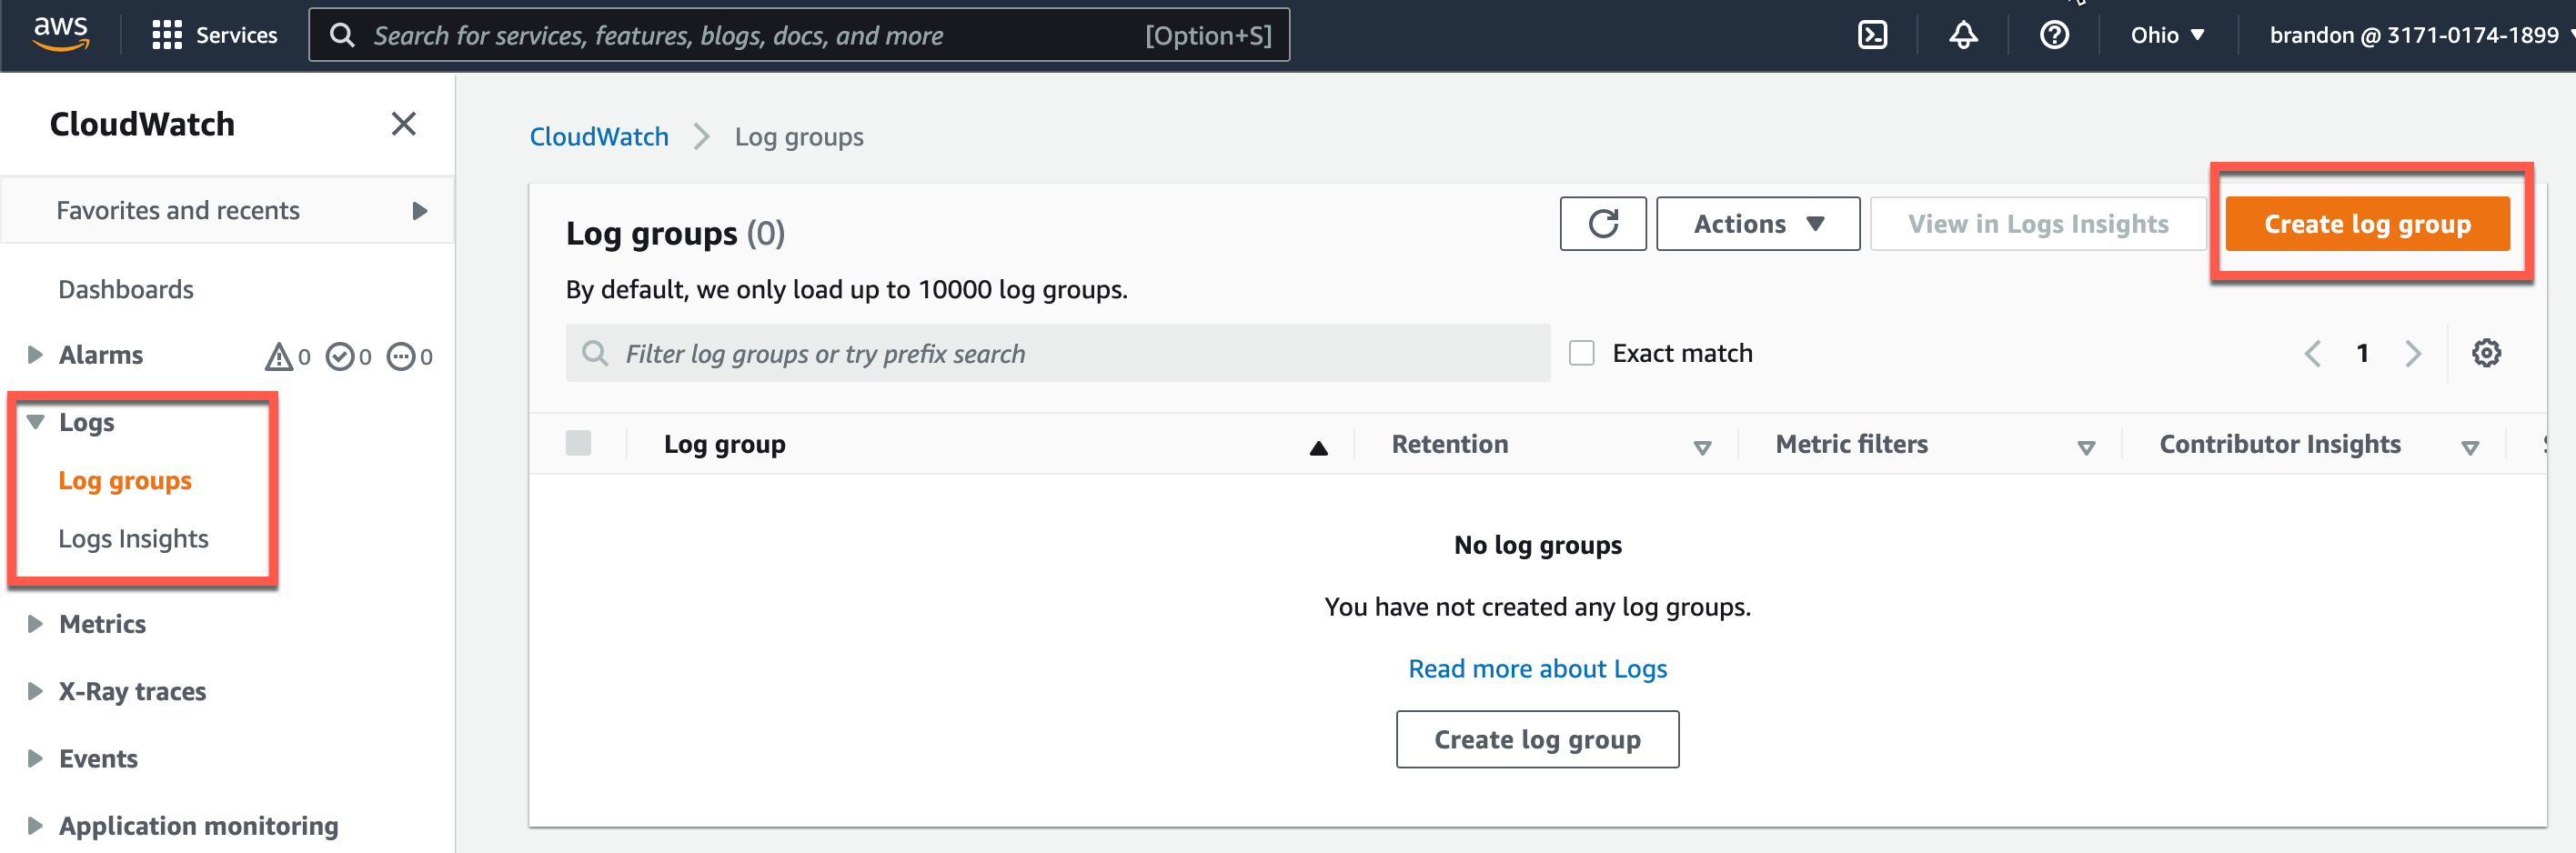
Give it whatever name you prefer, in this example I am going with “ssm-session”. Click “Create” 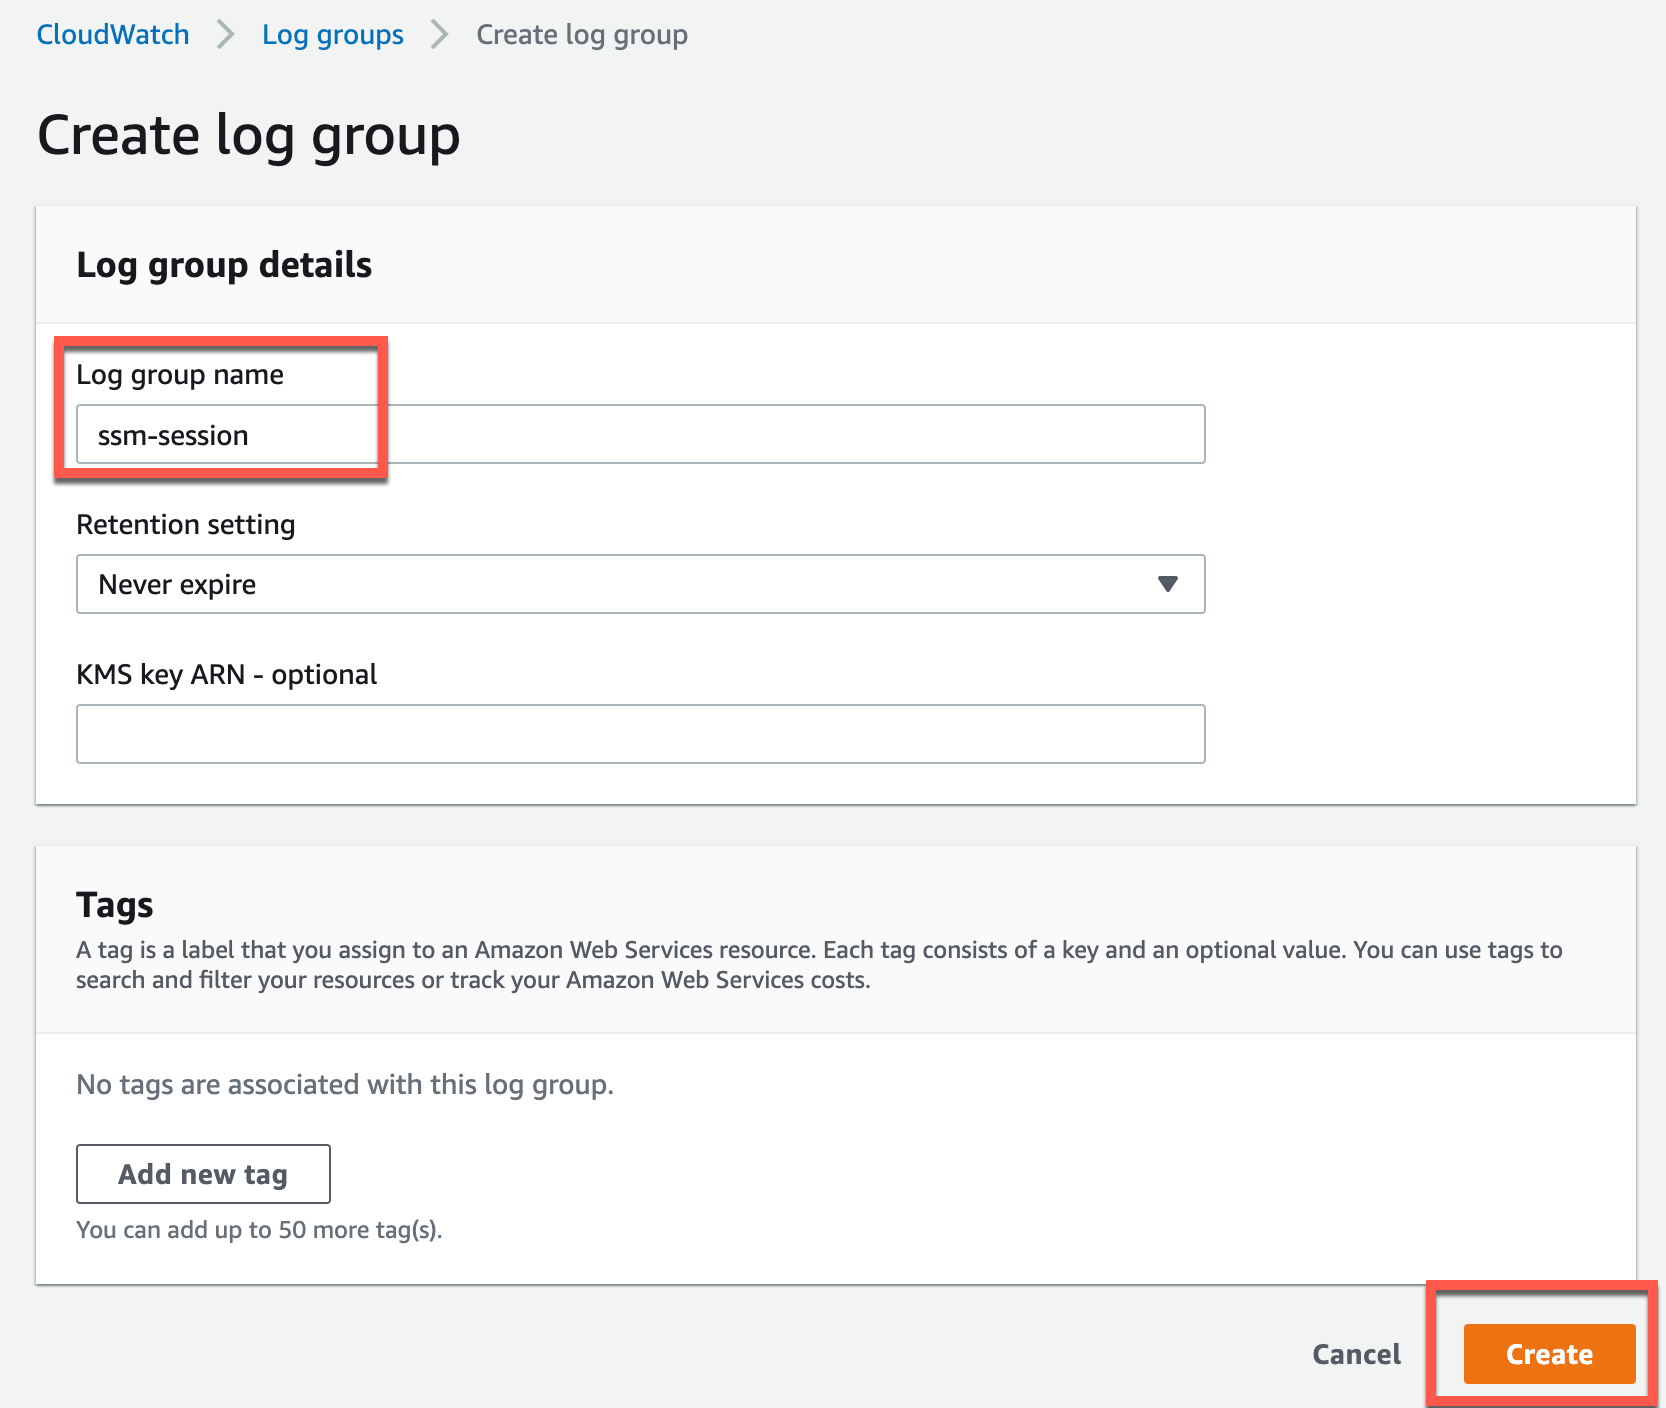
Now we need session manager to use the log we just created. Navigate to AWS Systems Manager > Session Manager and click on Preferences then Edit. 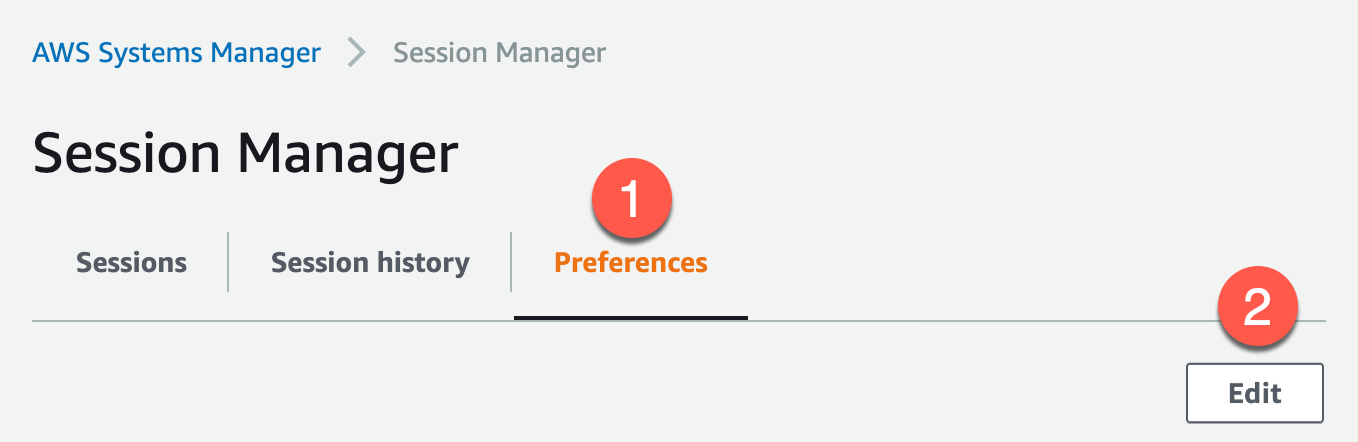
I disable “Enforce Encryption” for the sake of simplicity in this example.
First we are going to Enable CloudWatch Logging. Next we are going to keep the Recommended default of Stream Session Logs. Then we are going to uncheck the Enforce Encryption for this log group. Lastly we are going to choose the log group we just made in our CloudWatch in the last step. 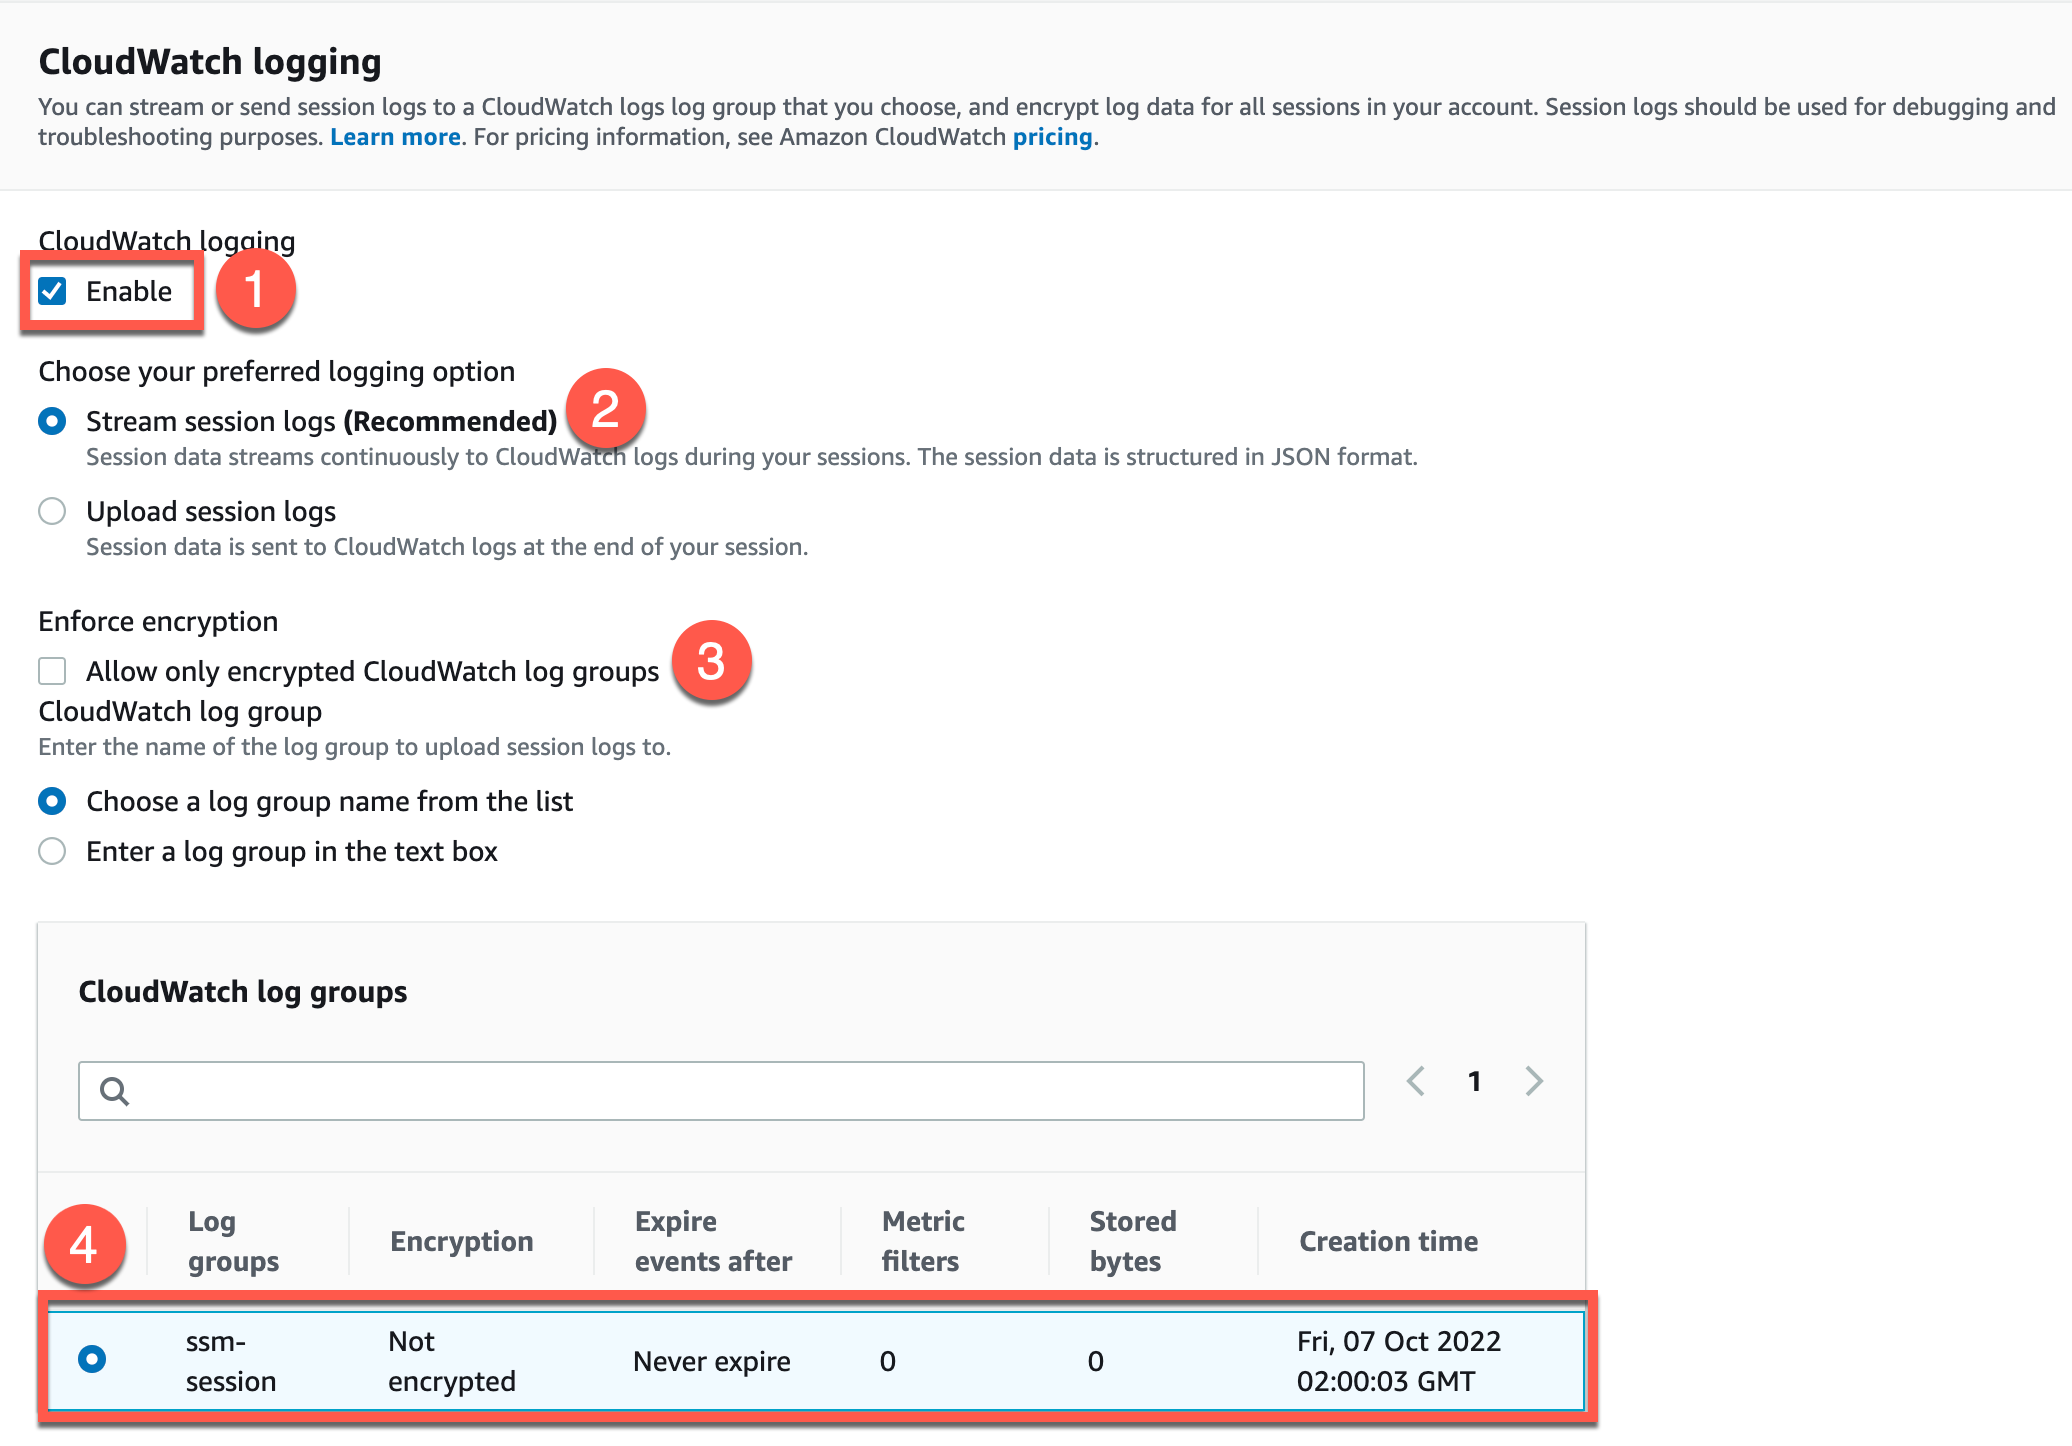
Install AWS CLI and AWS Session Manager Plugin
For this example I am on Mac. However, this can be achieved with both Windows and Linux. My recommendation for windows is to use Chocolately. When using Linux you can of course use your native package manager such as RPM or APT.
While using Mac I try to leverage Homebrew when I can.
Here are the two commands that will get AWS CLI and AWS Session Manager Plugin installed on your machine for Mac.
1
brew install awscli
1
brew install --cask session-manager-plugin
Create IAM Policy and IAM User and IAM Group
IAM Policy
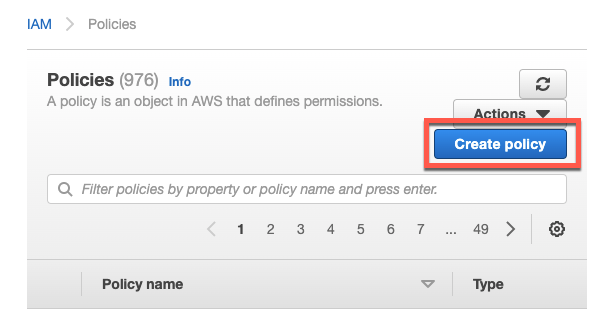
To create an IAM Policy we navigate to IAM Policies and click “Create Policy”.
Choose the JSON tab and paste in the code below. 
1
2
3
4
5
6
7
8
9
10
11
12
13
14
15
16
17
18
19
20
21
22
23
24
25
26
27
28
29
30
31
32
33
34
35
36
37
38
39
{
    "Version": "2012-10-17",
    "Statement": [
        {
            "Effect": "Allow",
            "Action": [
                "ssm:StartSession"
            ],
            "Resource": [
                "arn:aws:ec2:<region>:<account-id>:instance/*"
            ],
            "Condition": {
                "StringLike": {
                    "ssm:resourceTag/service": [
                        "proxy"
                    ]
                }
            }
        },
        {
            "Effect": "Allow",
            "Action": [
                "ssm:StartSession"
            ],
            "Resource": [
                "arn:aws:ssm:<region>::document/AWS-StartPortForwardingSession"
            ]
        },
        {
            "Effect": "Allow",
            "Action": [
                "ssm:TerminateSession"
            ],
            "Resource": [
                "arn:aws:ssm:*:*:session/${aws:username}-*"
            ]
        }
    ]
}
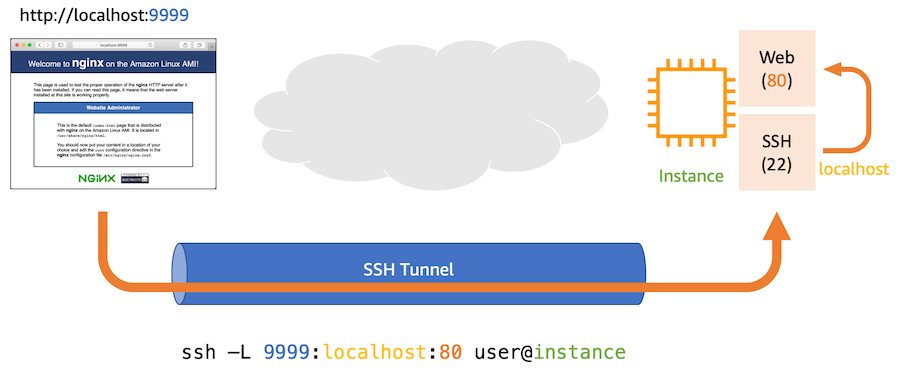
Note the “AWS-StartPortForwardingSession” part in the above JSON. Session Manager allows for SSH tunneling and it is enabled here. This feature can be very useful as demontrated in this picture.
This command tells SSH to connect to
instanceas userec2-user, open port 9999 on my local laptop, and forward everything from there tolocalhost:80on the instance. When the tunnel is established, I can point my browser athttp://localhost:9999to connect to my private web server on port 80.
Be sure to update <region> and <account-id> to the values required for your environment.
Review and name your IAM Policy and click “Create Policy”. For this example I am giving the name “DemoSessionPolicy”. 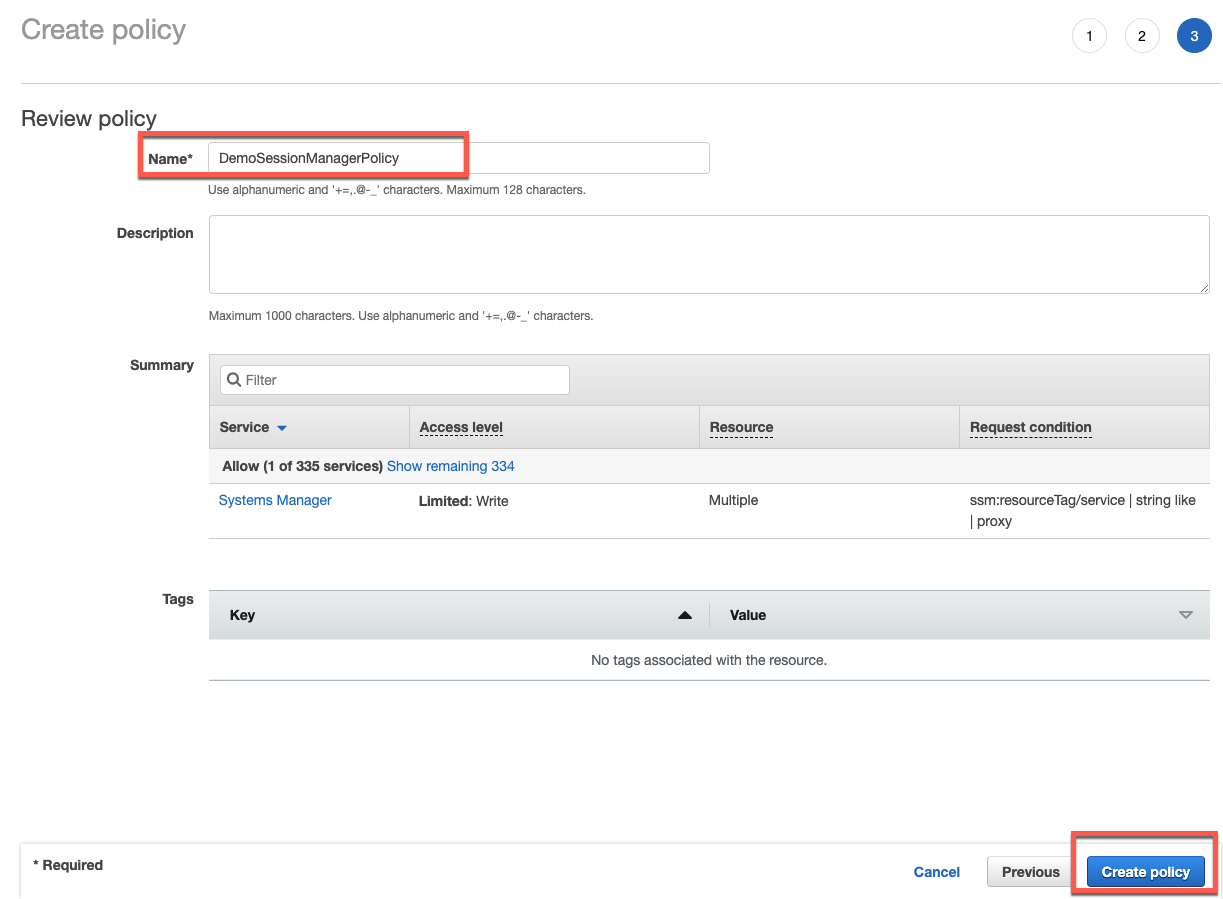
IAM Group
Next head over to IAM > User groups and click “Create Group”. 
Name your IAM Group. In this example I am naming it “SSMUsers” because whatever user I add to this group will have access to the Session Manager and be able to use the features we add earlier such as SSH tunneling. 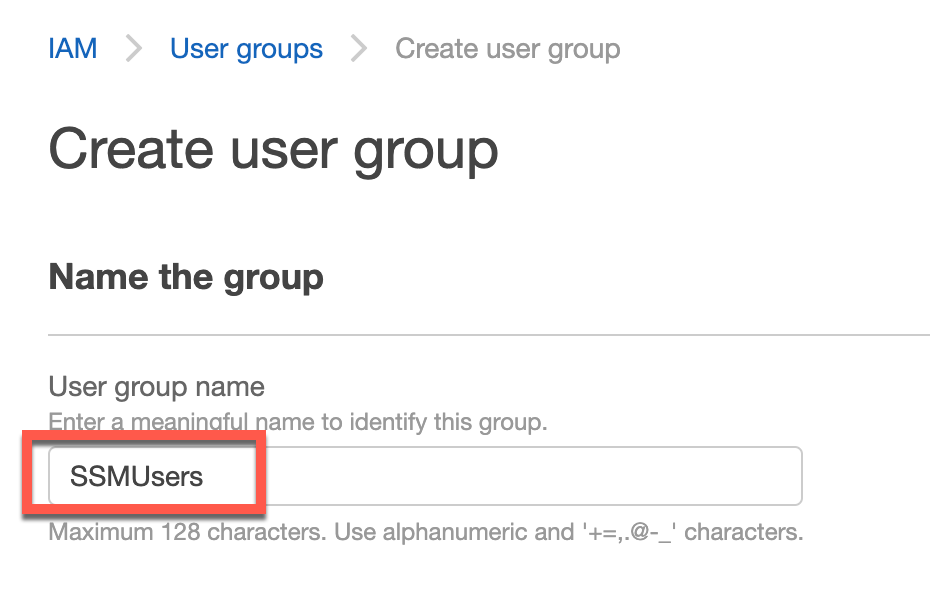
Attach the IAM Policy that we made earlier to the IAM Group. Customer managed polcies, such as the one we made, will be listed at the top of the list for convenience. Click “Create Group” at the bottom when complete. 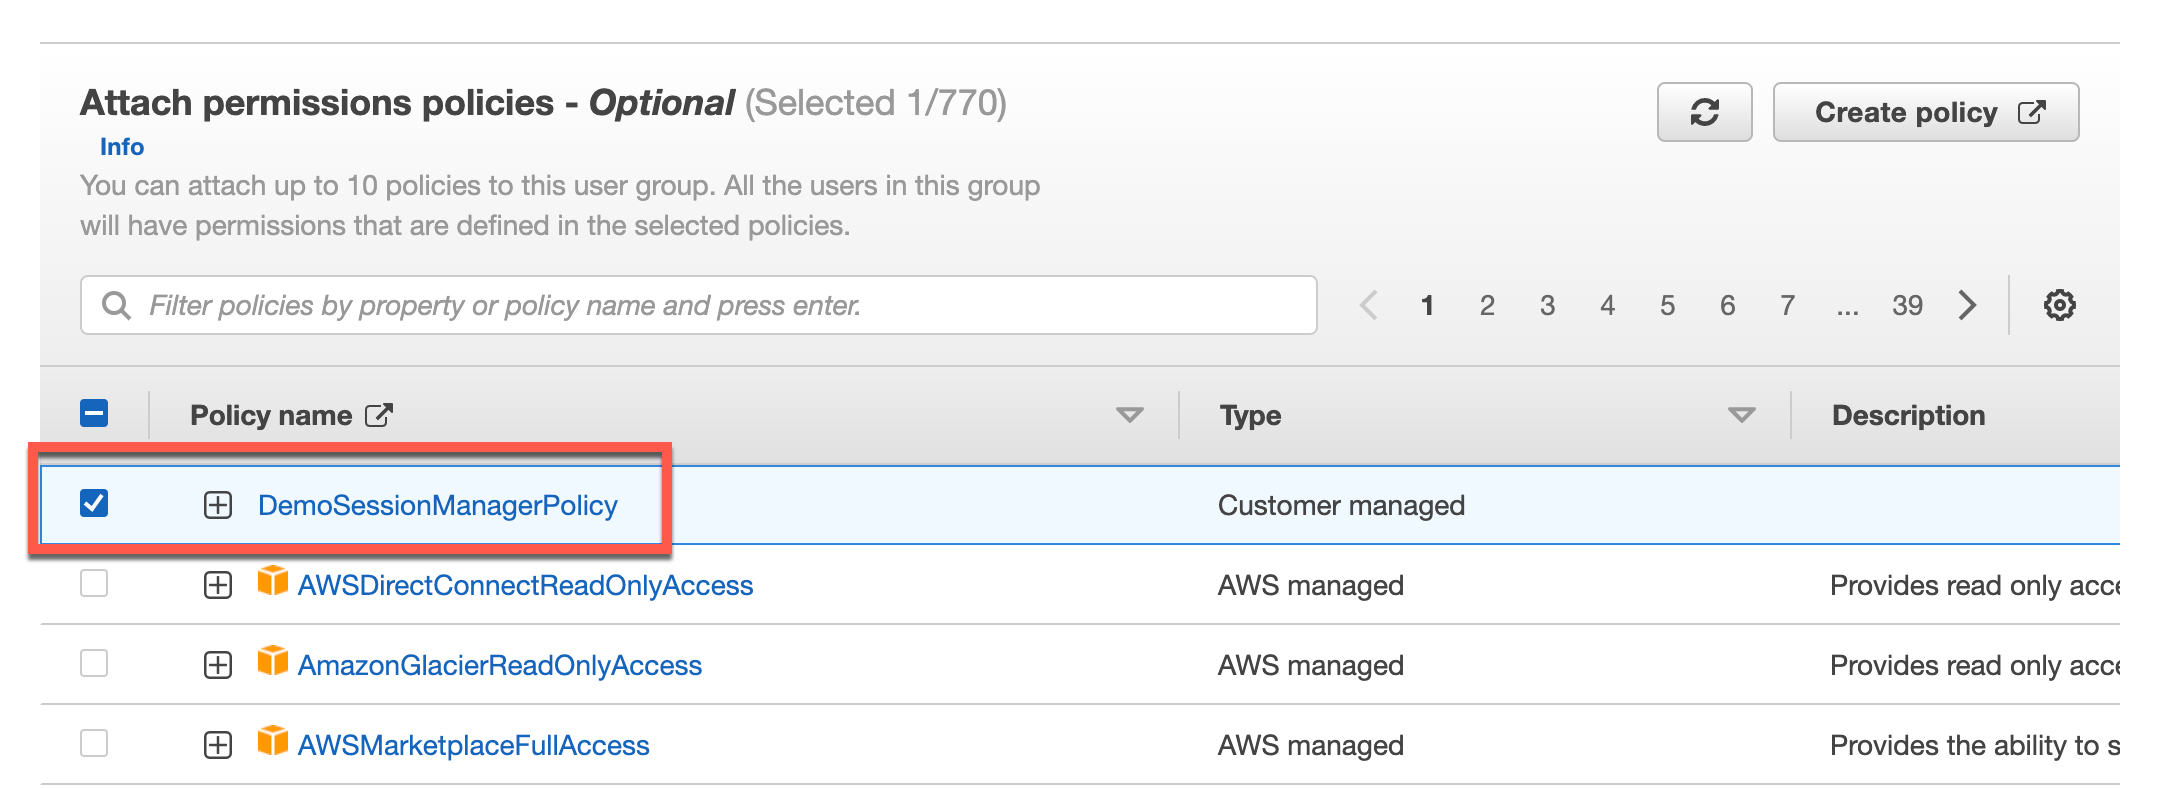
IAM User
Next head over to IAM > Users and click “Add User”. 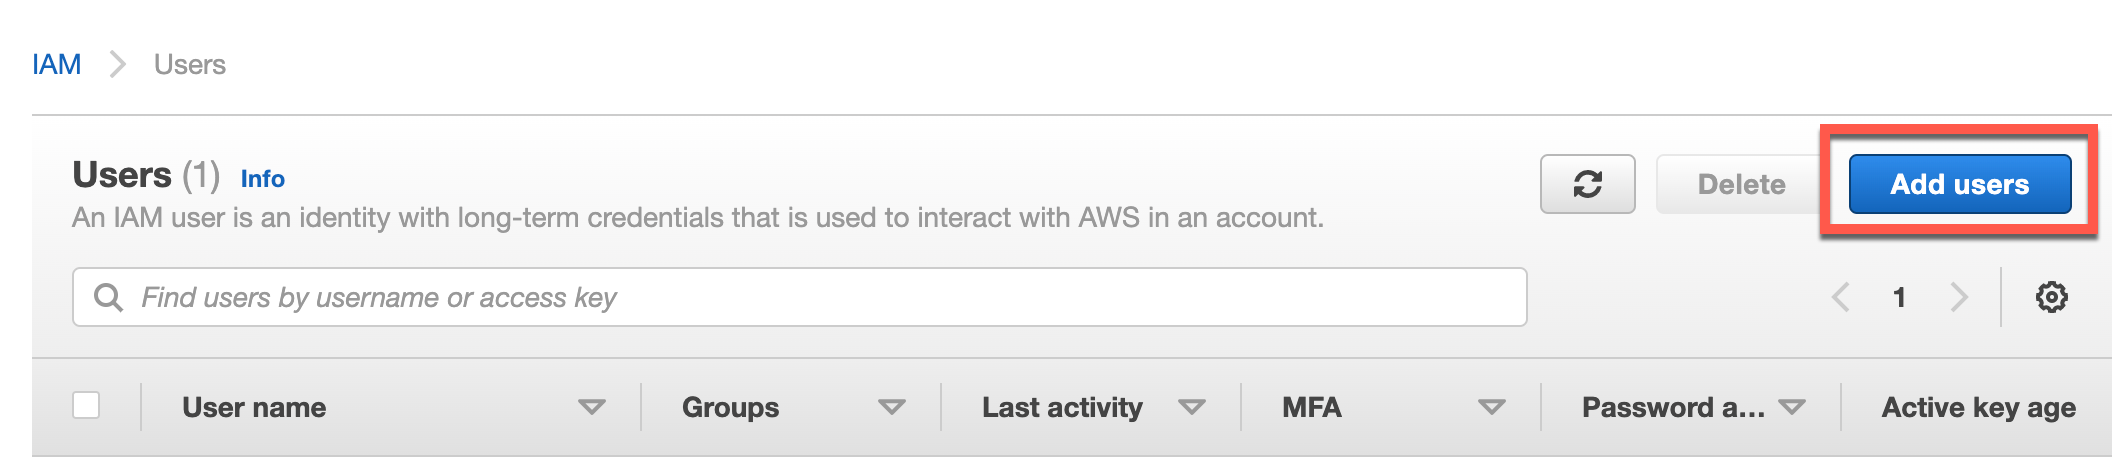
Name your user and choose Access Key - Programmatic access for AWS credential type. We choose this because this user does not need to access the console and only want to be access the AWS resources using SSM through things such as the AWS CLI. Click “Next: Permissions” at the bottom when complete. 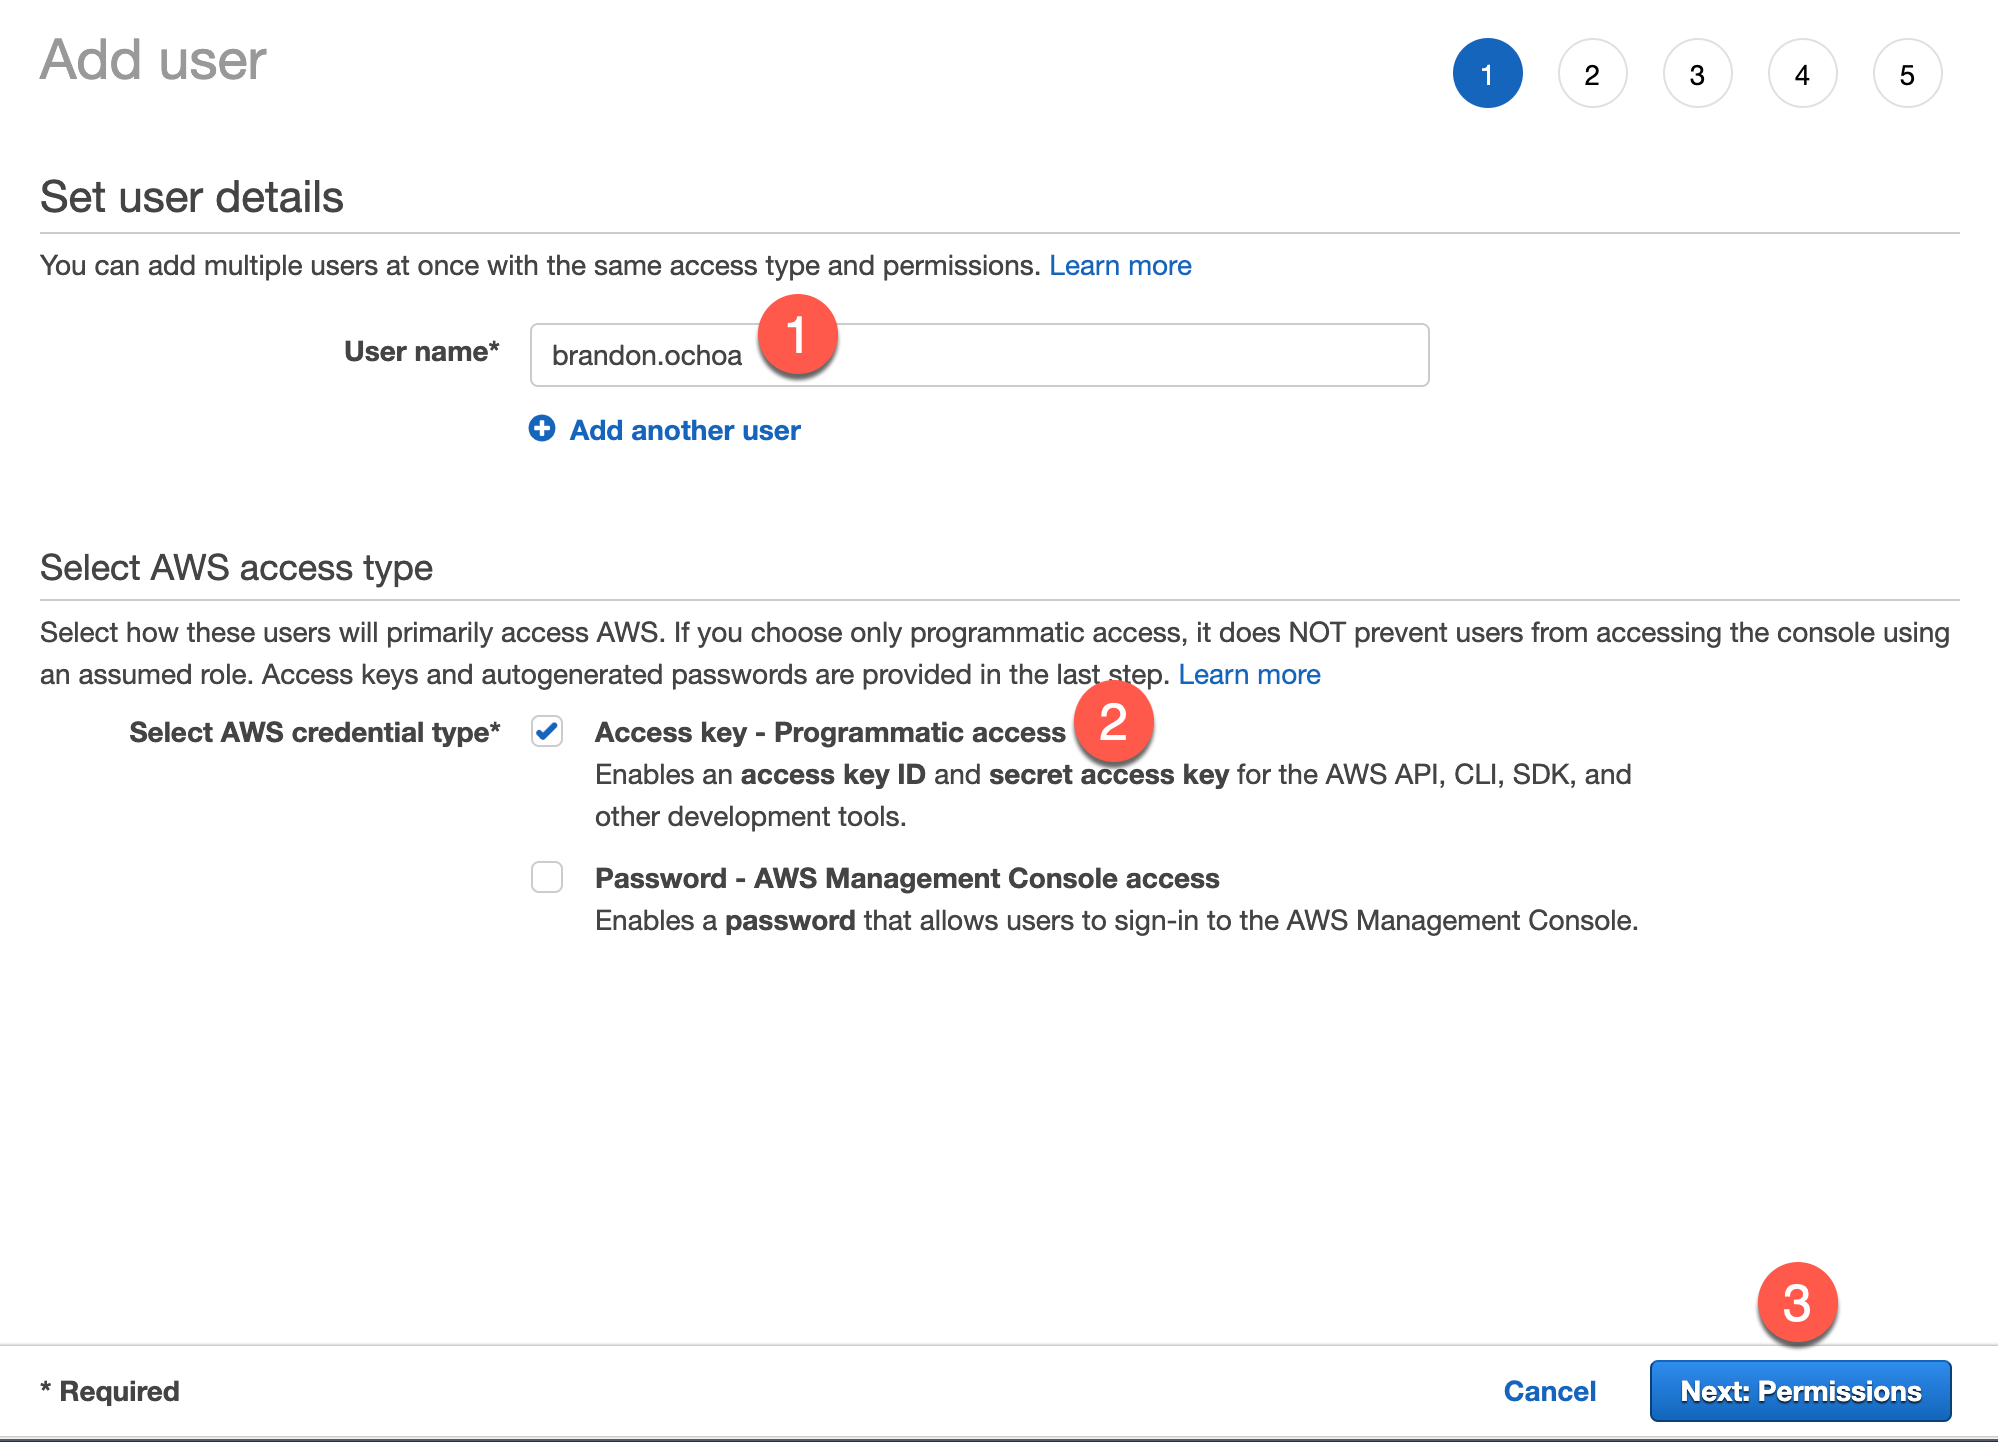
Since we already have a group set up from the previous step, we can simply add our new user to the group we just created in this step by ensuring Add user to group is selected, checking the box next to the group we want to be added to, and then clicking “Next: Tags” at the bottom. 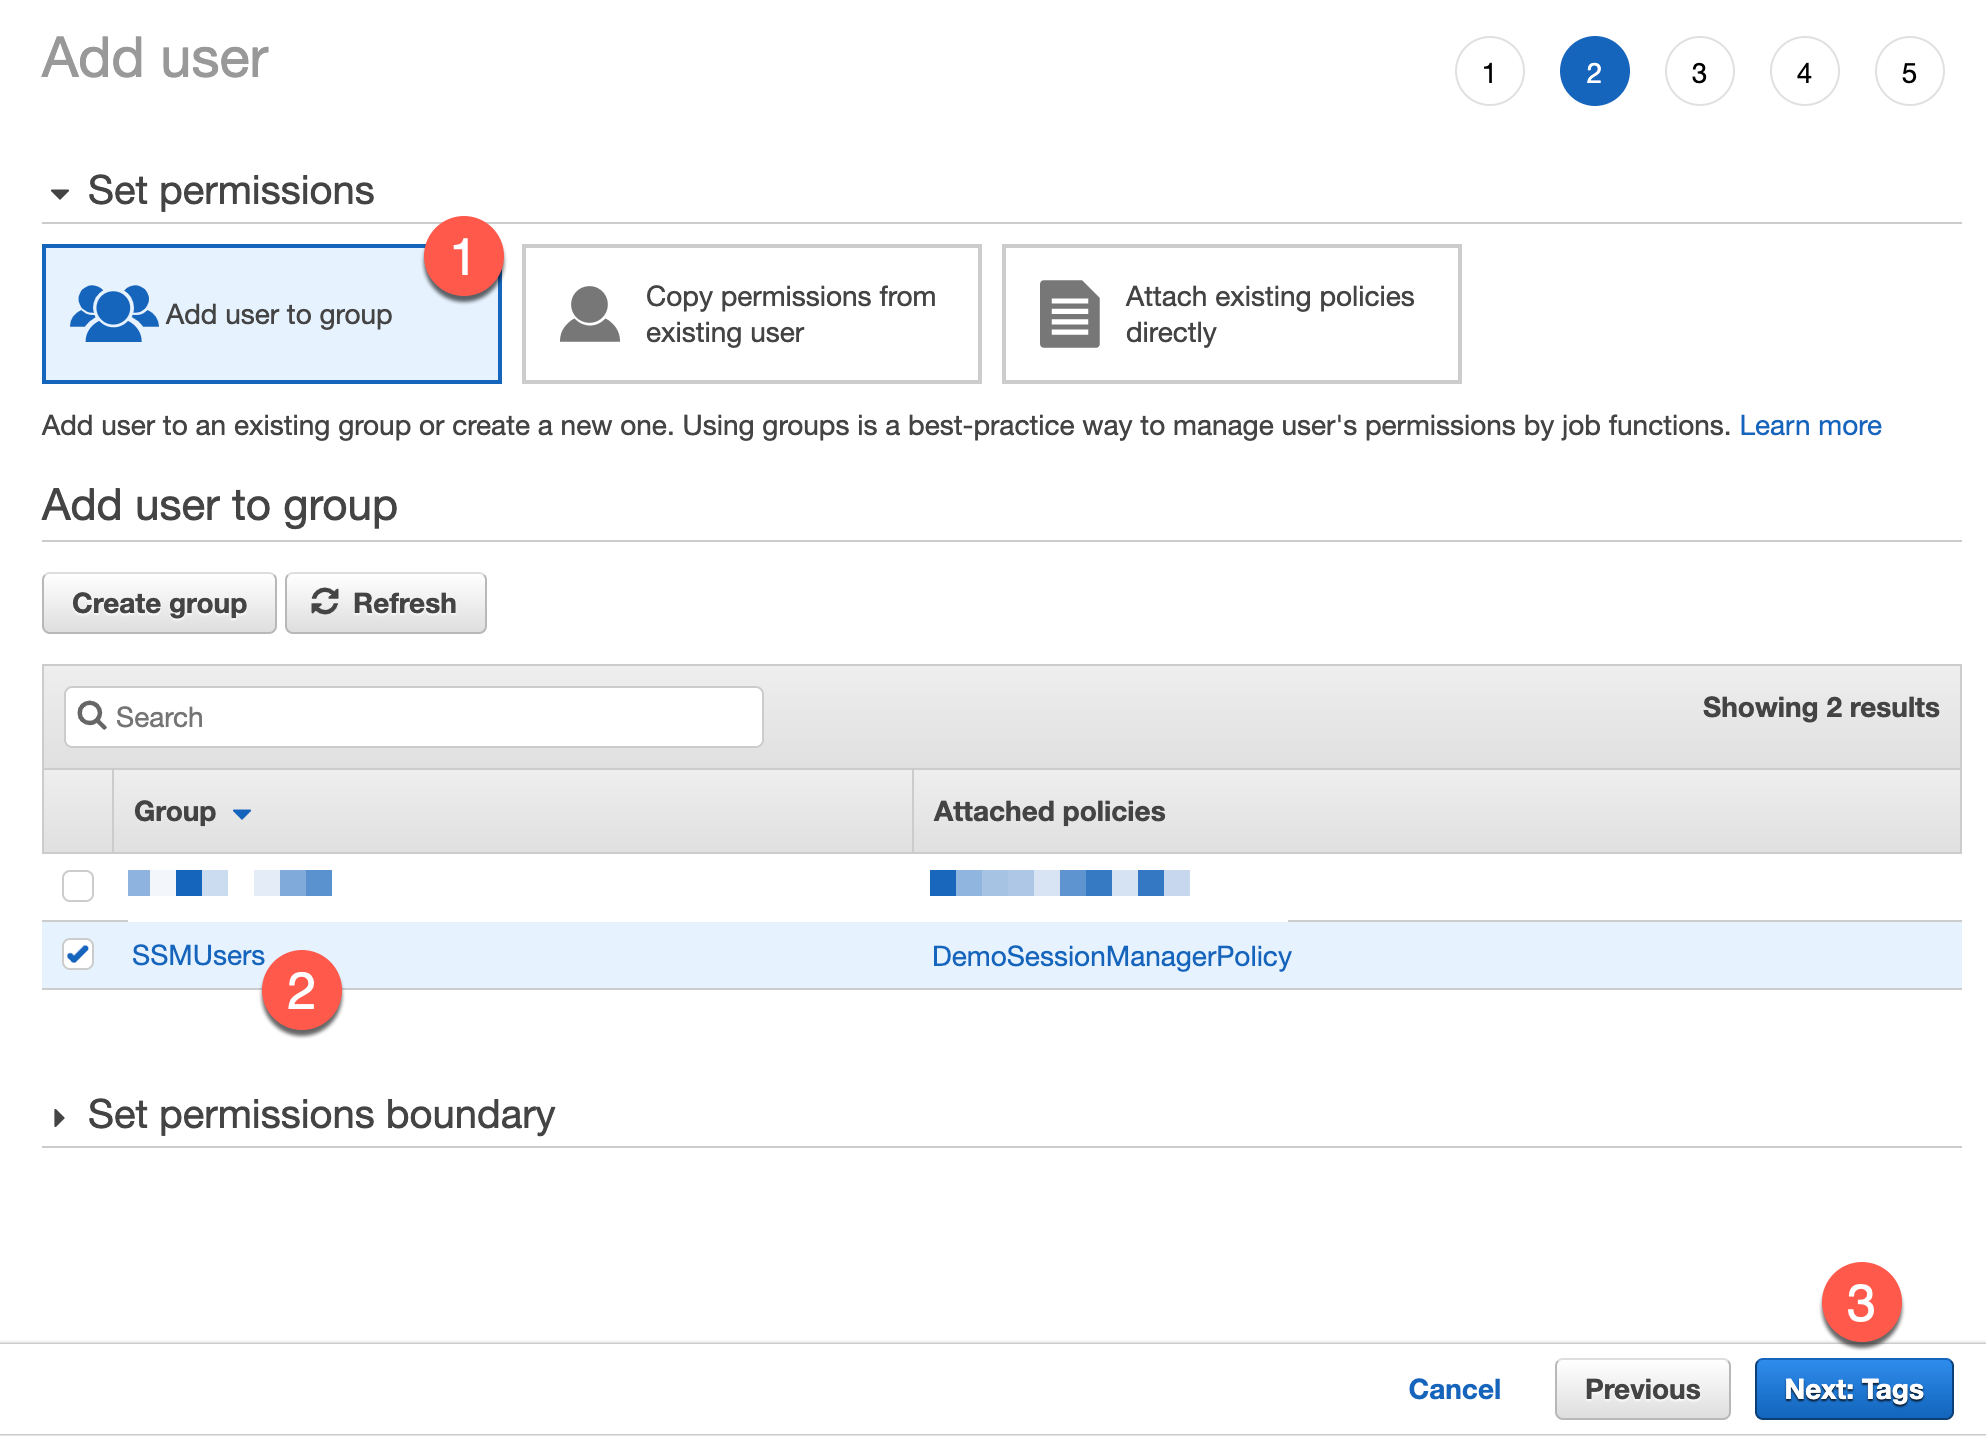
I don’t add any tags for this exmaple. Simply click “Next: Review”.
Click “Create User”. 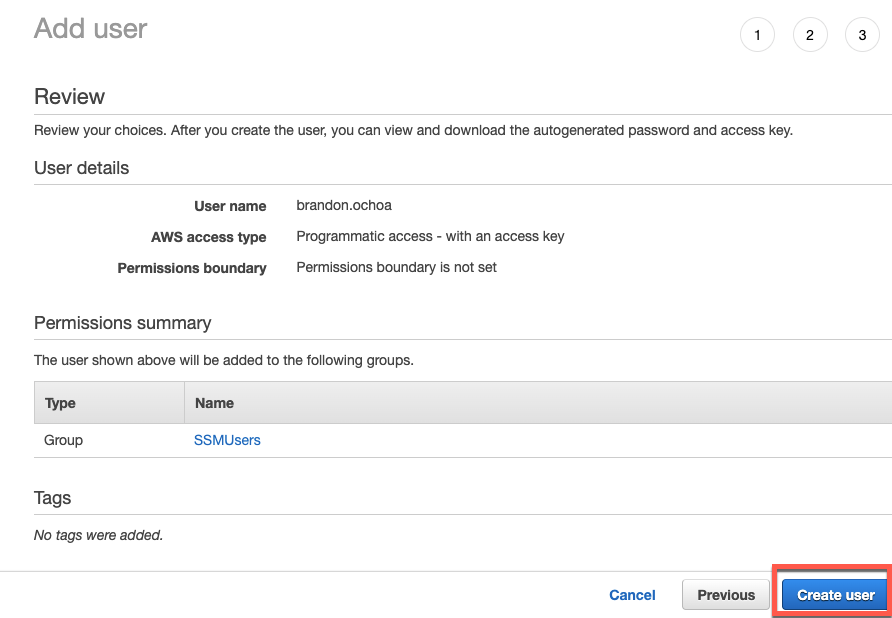
IMPORTANT! AWS Console will immediately provide us the
Access key IDandSecret access keyon the next screen because we chose the “Programmatic” access for this user. It is very important that you document this information somewhere safe that you know you will be able to access and find again. There is aDownload .csvoption here which is a useful quick and easy step. However, I recommend using something like theAWS Secrets Managerfor storing information such as this (This feature is not free and will cost a small fee).If you close this screen without saving the information, you will *NOT* be able to retrieve this information again and you *WILL* need to recreate a new user to recreate the information.
Document your Access key ID and Secret access key someplace safe and where you can find it again. 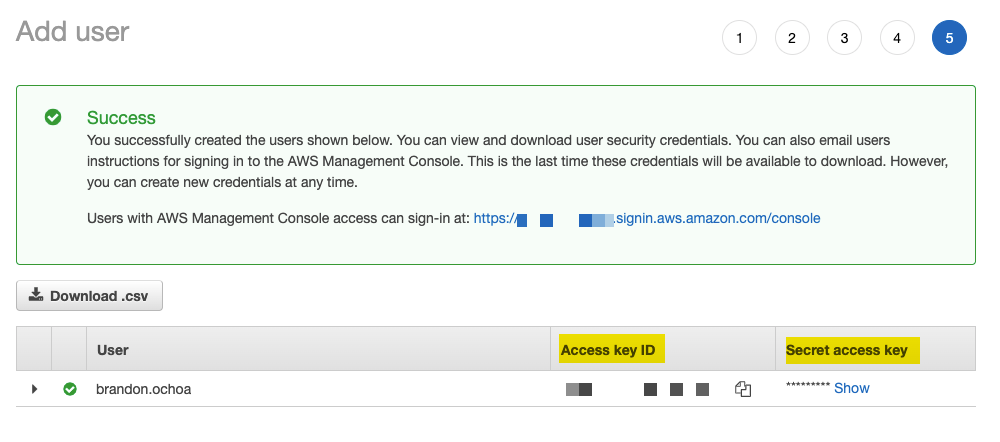
SSH to EC2 Instance
Now that we have an IAM User, Role, Group, Policy set up and AWS CLI plus Session Manager Plugin installed we can ssh into our EC2 resource with the AWS CLI.
First we need to configure our AWS CLI witht the following command.
1
aws configure
Next we will provide that AWS Access Key ID and AWS Secret Access Key that we definitely documented earlier.
Afterwards it will ask for the following- Default region name: us-east-2 (This is my setting) Default output format: json (This is default and what I used)
To start a session run the following command. Replace <instance-id> with your own instance-id.
1
aws ssm start-session --target <instance-id>

Port Forward from EC2 to localhost
Setting Up EC2 Instance
To demonstrate the port forwarding feature we will use a simple NGINX server on our demo ec2 instance.
Let’s start by installing NGINX with the linux package manager by using the following command.
1
sudo amazon-linux-extras install nginx1 -y
I chose the Linux AMI provided by Amazon and therefore I am not using something such as yum or apt. Instead it uses “amazon-linux-extras”.
After NGINX is installed, let’s us systemd to start and check our server’s status.
1
sudo systemctl start nginx
1
sudo systemctl status nginx
Now we will see that our NGINX server is active and running.
Starting Port Forward
Let’s start a port forward session with the following command. Be sure to enter the correct ec2-instance-id for your command.
1
2
3
4
aws ssm start-session \
    --target <ec2-instace-id> \
    --document-name AWS-StartPortForwardingSession \
    --parameters '{"portNumber":["80"], "localPortNumber":["8080"]}'
Your terminal will display that it is Waiting for connections...
Let’s make that connection! Simply open your browser from your local machine that you are running the AWS SSM command from and navigate to http://localhost:8080 and you will be greeted with “Welcome to NGINX on Amazon Linux!”
We have successfully created and used our SSH Tunnel with the SSM!